Blog

  • How Home-Repair Businesses Can Build a More Useful Online Presence

    A good electrician can be hard to find online. The same goes for a reliable plumber, painter, or renovation contractor. Homeowners often start with a search, then compare websites, reviews, and advice before calling anyone. For a small home-service business, being visible in those results matters—but visibility is only useful if the information behind it is relevant and trustworthy.

    That’s where online marketing can get confusing. There are websites, directories, social media pages, paid ads, and link-building tactics with unfamiliar names. You don’t need to use every tactic. It helps to understand what each one does, what it can’t do, and how to avoid spending money on activity that brings no real enquiries.

    Start With the Basics Homeowners Look For

    Before thinking about search rankings, make sure your business gives a potential customer the practical details they need. A homeowner with a leaking pipe or a half-finished bathroom isn’t looking for clever marketing language. They want to know whether you work in their area, what jobs you take on, how to contact you, and what happens next.

    • Describe your services clearly. List the jobs you actually do, rather than relying on broad terms like “complete solutions.”
    • Show where you work. Name the towns or neighbourhoods you serve, especially if you travel only within a limited radius.
    • Make contact easy. A phone number, enquiry form, and realistic response times should be easy to find on a mobile screen.
    • Use real project photos. Before-and-after images can show workmanship, but get the client’s permission and avoid implying that every job will have the same result.

    A basic, useful website can do more for a small contractor than a complicated marketing campaign. It also gives you somewhere to direct people who find your business through a referral or local listing.

    What Are Niche Edits?

    Niche edits are links added to existing online articles or pages, usually because the page already covers a related subject. For example, a home-maintenance article might be updated to link to a relevant guide or service page. The idea is that a link placed in context can help readers find useful information and may also support a website’s search visibility.

    The details matter. A link makes sense when it genuinely helps someone continue reading or solve a problem. A link to a local roofer’s storm-damage checklist could fit a relevant article about roof maintenance. A link to an unrelated service inserted into a page just because it has a strong search profile is less useful to readers and may look manipulative.

    If you’re unfamiliar with the practice, this guide to niche edits explains how link insertions work. Treat any promised ranking gains cautiously. Search visibility depends on many factors, and a purchased link cannot guarantee a particular position or steady enquiries.

    Check Quality Before Paying for Link Work

    It’s tempting to judge a website by a single number or a confident sales pitch. Instead, look at the page where your link would appear. Does the site publish useful material for homeowners, landlords, or property professionals? Is the article maintained and readable? Would a person in your service area plausibly visit it?

    Ask for the proposed page and the exact context before agreeing to anything. A link should fit the sentence and the surrounding information, not interrupt it. Check that the destination page answers the question the link implies it will answer. A link to a contractor’s booking page may be less helpful in a general safety article than a detailed guide explaining how to spot a problem and when to call a professional.

    Also be wary of bulk offers promising hundreds of placements for a very low price. Links on unrelated or low-quality pages may bring little value, and a large volume of them can create risk rather than a reliable marketing foundation. A smaller number of relevant mentions is easier to assess.

    Keep Useful Content at the Centre

    The strongest reason for another website to mention your business is that you have something worth sharing. That might be a seasonal checklist for preparing pipes for cold weather, a plain-English guide to comparing renovation estimates, or a photo-led explanation of what happens during a roof repair. Make the advice specific, and be clear about when a homeowner should stop attempting a repair and call a qualified tradesperson.

    Good content can also help you answer questions that come up repeatedly on the phone. If customers often ask whether a bathroom can be renovated in stages, write a practical explanation of the trade-offs. Include likely disruption, decisions to make before work begins, and the importance of checking local requirements where relevant. Avoid publishing exact prices as universal facts; costs vary with materials, location, access, and the condition of the property.

    Creating and editing this material takes time. If you need outside help, a freelance marketplace such as Osdire lets buyers hire freelancers across areas including writing, design, programming, and marketing. Agree on the scope, examples, deadlines, and review process before work starts. You should still check technical claims and make sure the finished copy reflects how your business actually operates.

    Don’t Neglect Local Reputation

    Links and website content are only part of the picture. Ask satisfied customers if they’re comfortable leaving an honest review, and respond calmly to complaints. Keep your business details consistent across directories, including your service area and phone number. If you change hours or stop offering a particular service, update those listings rather than leaving outdated information for customers to find.

    For construction and repair work, credibility is built through small details: a clear written estimate, realistic scheduling, tidy communication, and no surprises about what is included. Online marketing may help the right people discover you, but the experience after they make contact is what earns referrals.

    Final Thoughts

    Building an online presence for a home-service business doesn’t require chasing every new tactic. Make your service information clear, publish advice that genuinely helps homeowners, and assess any proposed link by asking whether it belongs on that page for a reader’s sake. Niche edits can be one part of a wider approach, but they’re not a substitute for useful work, transparent communication, or a good local reputation.
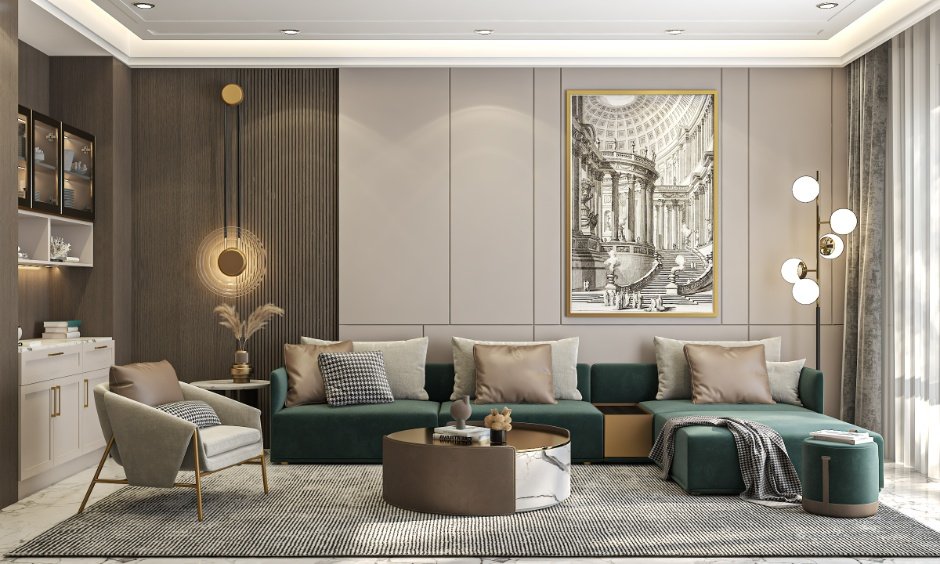
  • Open Floor Plan Design: Pros, Cons, and Layout Tips

    Open Floor Plan Design: Pros, Cons, and Layout Tips

    Someone asked me last week whether they should knock down the wall between their kitchen and living room. Classic question. Everyone wants that open, airy feel these days, but nobody talks enough about what you’re actually giving up.

    Open floor plan design isn’t automatically the right choice for every home. It works brilliantly in some layouts and creates real headaches in others. I’ve seen both outcomes up close, and the difference usually comes down to planning, not just enthusiasm.

    This isn’t going to be a one-sided pitch for open layouts. It’s a straight rundown of what to expect — good and bad — plus the layout tricks that actually make open floor plan design work in real Indian homes, not just in Pinterest photos.

    What Exactly Counts as an Open Floor Plan?

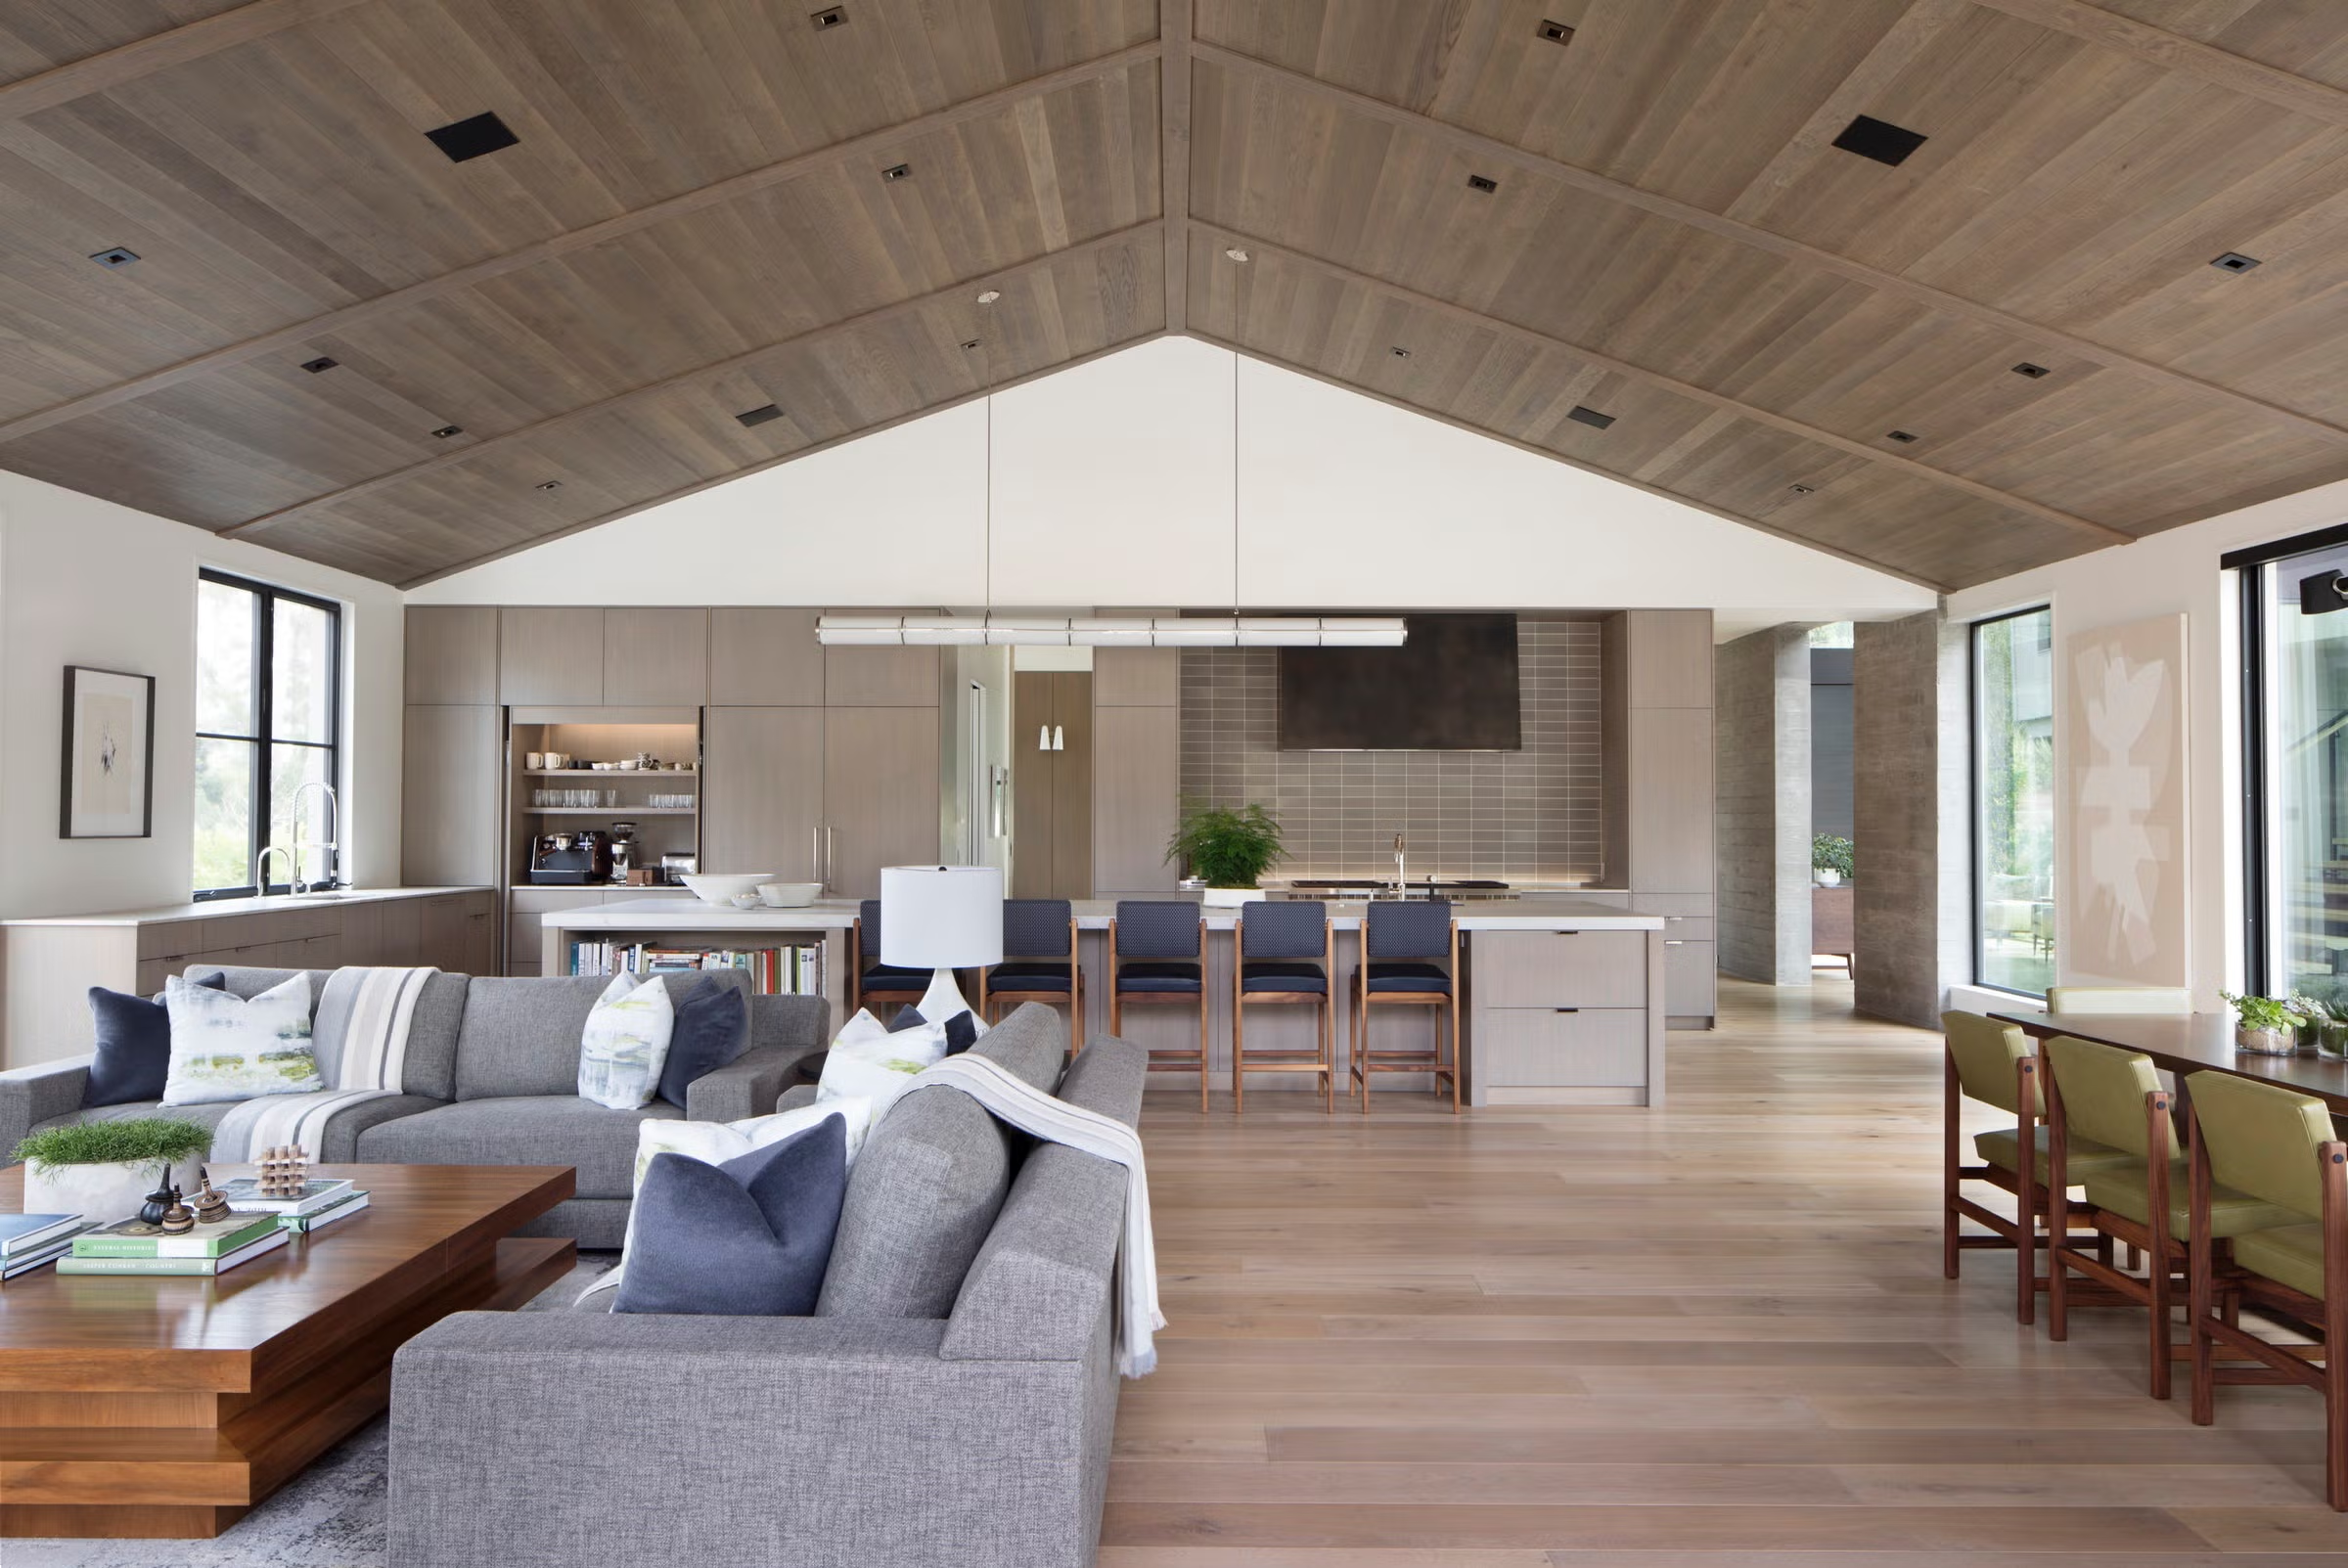
    Featured snippet: An open floor plan removes or minimizes walls between key living spaces — typically the kitchen, dining, and living room — creating one continuous area instead of separate closed rooms connected by doorways and corridors.

    It’s not all-or-nothing, though. Some homes go fully open, merging three or four rooms into one large space. Others do a partial version — say, opening up just the kitchen and dining while keeping bedrooms closed off.

    In Indian homes specifically, full open plans are still less common than in Western housing, mostly because of cooking habits. Indian cooking involves a lot of frying, tempering, and strong spices — and that smell travels fast in an open layout. Worth keeping in mind before you get too excited about the concept.

    The Real Advantages of Open Floor Plan Design

    Let’s start with why people want this in the first place. And to be fair, the reasons are pretty legitimate.

    More natural light reaches deeper into the home when walls aren’t blocking it. A north-facing kitchen that used to feel dim can suddenly get decent daylight bouncing in from the living room’s windows.

    It also just feels bigger. A 900 sq ft apartment with an open kitchen-living-dining layout can feel noticeably more spacious than the same square footage chopped into three closed rooms. That’s not an illusion — it’s genuinely more usable floor area since you’re not losing space to extra walls and doorways.

    Some other real benefits:

    • Easier to keep an eye on kids while cooking — genuinely useful for families with young children
    • Better airflow and cross-ventilation in many cases
    • Feels more social; you’re not stuck in the kitchen while guests sit separately
    • Furniture arrangement has more flexibility since there are fewer fixed walls dictating layout

    I’ll admit, the social aspect is the one that wins most clients over. Cooking while chatting with people in the next room instead of feeling isolated — that matters more to some families than the design magazines ever mention.

    The Downsides Nobody Really Warns You About

    Here’s where I’ll push back on the trend a bit. Open plans aren’t free of problems, and some of them are annoying enough to regret.

    Featured snippet: The main drawbacks of open floor plan design are noise travel, cooking odors spreading through the home, loss of privacy, and higher cooling costs since one large open space is harder to cool efficiently than smaller closed rooms.

    Noise is the big one. If someone’s watching TV in the living room, that sound reaches the kitchen, the dining area, sometimes even nearby bedrooms. For homes with elderly parents who nap in the afternoon or kids doing online classes, this gets old fast.

    Cooking smell is the other major complaint I hear repeatedly. Even with a good chimney, deep frying or tempering dal can leave odors lingering through the whole open space for hours. Ask anyone who’s lived with an open kitchen through a full festival cooking season.

    Cooling costs go up too. One large open volume of air takes more energy to cool than the same area split into smaller rooms — a factor that matters a lot given how hot Indian summers get. Expect your AC to work harder, especially if the open space includes high ceilings.

    And honestly? Clutter shows more. There’s nowhere to “hide” a messy kitchen counter or a pile of laundry when it’s all visible from the sofa.

    Layout Tip: Zone Without Walling It Off

    So how do you get the openness without the chaos? Zoning.

    This means using visual and physical cues — without actual walls — to define where one “room” ends and another begins. It’s become one of the most useful layout techniques in modern open floor plan design.

    Some ways to do this:

    1. Rugs to anchor the seating area separately from the dining zone
    2. A change in flooring material or level — even a two-inch step can signal a shift in “room”
    3. Pendant lighting hung specifically over the dining table to visually mark that zone
    4. A half-height shelving unit or bar counter as a soft divider between kitchen and living room

    Picture a 3BHK in Ahmedabad where the owners opened up their kitchen and living area but kept a waist-high granite counter between them. It still reads as one open space, but the kitchen mess stays somewhat out of the main sight line when guests are over. Small trick, big payoff.

    Layout Tip: Plan the Kitchen Exhaust Carefully

    This one gets overlooked constantly. If you’re going open, your chimney and ventilation need to be stronger than what you’d install in a closed kitchen.

    A standard 60cm chimney with average suction might handle a closed kitchen fine, but in an open layout you’ll want higher suction capacity — something in the 1200-1400 m³/hr range rather than the more common 1000 m³/hr units — plus proper external ducting, not just a recirculating filter.

    Don’t skip this step. It’s the single biggest regret I hear from open-kitchen homeowners after the fact.

    Layout Tip: Keep Some Acoustic Separation

    You don’t have to go fully open everywhere. Sliding glass partitions or pocket doors between the living room and kitchen give you flexibility — open when you want the airy feel, closed when someone needs quiet or you’re deep-frying pooris.

    [link to related guide on kitchen renovation cost guide here]

    This hybrid approach has become more popular in 2026, especially among people who tried a fully open layout in a previous home and found it too noisy or too smelly to live with long-term.

    Layout Tip: Furniture Placement Does the Heavy Lifting

    In an open floor plan, furniture becomes your wall substitute. A sofa placed with its back to the dining area, rather than against an actual wall, naturally divides the space without blocking light or airflow.

    A few placement ideas that work well:

    • Console table behind a sofa to create a soft boundary
    • Bookshelf (open-backed, not solid) as a partial divider that still lets light through
    • Area rugs sized to fit within each “zone,” not stretching across the whole floor

    Has your open living room ever felt like furniture is just floating randomly in the middle of nowhere? That’s usually a sign the zoning wasn’t planned properly from the start.

    Who Should Actually Avoid a Fully Open Layout?

    Not everyone should do this, and I think more designers should say so upfront instead of pushing the trend on every client.

    Joint families with different daily schedules — some working night shifts, some running a home business, some with young kids napping — often struggle with fully open layouts. The lack of separation that makes open plans great for some households makes them exhausting for others.

    If you cook elaborate Indian meals daily involving heavy tempering and frying, a fully open kitchen might genuinely frustrate you within six months. A partially open layout, or one with strong ducted ventilation and a partition option, tends to age better for these households.

    [link to related guide on smart home upgrades here]

    FAQ: Open Floor Plan Design

    Is an open floor plan more expensive than a closed layout? It depends. Removing load-bearing walls during renovation costs more due to structural reinforcement — sometimes ₹15,000-40,000 extra depending on the wall and span. But in new construction, it’s often comparable, sometimes even cheaper since you’re using less material for interior walls.

    Can I convert my existing closed kitchen into an open one? Usually, yes, but you’ll need a structural engineer to check if the wall is load-bearing first. Non-load-bearing walls are straightforward to remove. Load-bearing ones need a beam installed, which adds cost and time.

    Does an open floor plan increase resale value? In most urban Indian markets, yes, moderately — buyers do respond well to the spacious feel. That said, it’s not a guaranteed value boost everywhere, and some buyers specifically prefer closed kitchens for the reasons mentioned above.

    How do I stop cooking smells from spreading in an open layout? A high-suction chimney with proper external ducting is non-negotiable. Beyond that, some homeowners install a small exhaust fan near the stove as backup, and a few even keep a compact secondary “wet kitchen” for heavy frying, tucked behind a partition.

    Is open floor plan design still trending in 2026, or is it fading? It’s evolving rather than fading. Fully open layouts are giving way to hybrid versions with sliding partitions or zoned furniture — people still want the light and space, just with more control over noise and smell than before.

    What’s the minimum space needed for an open floor plan to work well? There’s no strict rule, but under roughly 500 sq ft, an open layout can start feeling cramped rather than spacious once furniture and appliances are in, since there’s less room to properly zone each area.

    Final Thoughts

    Open floor plan design genuinely works well for a lot of homes — more light, more flexibility, a better social feel. But it’s not automatically right just because it’s popular right now.

    Think honestly about your household’s daily rhythm, your cooking habits, and how much you value quiet separation before you knock down a wall you can’t easily put back. A hybrid approach with smart zoning and a strong exhaust setup gives you most of the benefits without as many of the headaches.

    If you’re on the fence, start small — open up just the kitchen and dining first, live with it for a few months, and see how it actually feels before committing to a fully open layout for the whole home.

  • Modern Home Design Trends 2026: What’s Actually Worth It

    Modern Home Design Trends 2026: What’s Actually Worth It

    Walk into any newly built apartment in Bengaluru or Pune right now, and you’ll notice something. The living rooms don’t look like they did five years ago. Fewer showpieces. Less clutter. More breathing room. That shift is exactly what’s driving the modern home design trends 2026 conversation — and honestly, some of it is overdue.

    I’ve spent the last few months visiting client homes and sitting through more design consultations than I can count, and a pattern keeps showing up. People aren’t chasing “trendy” anymore. They want spaces that feel calm, work harder, and don’t need replacing every three years. That’s the real story behind modern home design trends 2026 — less about aesthetics, more about how a home actually functions.

    Let’s get into what’s genuinely changing, and what’s just noise.

    1. Quiet Luxury Is Replacing “Showroom” Interiors

    Featured snippet: Quiet luxury in home design means fewer statement pieces and more focus on material quality — think solid wood, honest stone, and tactile fabrics — over flashy finishes that scream for attention. It’s understated, but it costs real money to get right.

    For years, the goal was to make a room look like a furniture showroom. Glossy laminates, mirror work, a chandelier in every hallway. That’s fading.

    What’s replacing it? Materials that feel good, not just look good. Solid wood over veneer. Limewash walls instead of glossy paint. Handloom textiles rather than printed polyester. It costs more upfront — a decent limewash finish can run ₹80-120 per square foot compared to ₹25-30 for standard paint — but it ages beautifully instead of looking tired after two monsoons.

    I’ll be honest, I was skeptical of this trend at first. It sounded like an excuse to charge more for “less.” But after seeing a client’s home two years post-renovation, the quiet luxury pieces still looked intentional. The trendy stuff from the same era? Already dated.

    2. Biophilic Design Goes Beyond a Few Potted Plants

    Everyone’s heard “add more plants” by now. That’s not what biophilic design actually means in 2026.

    It’s about designing the whole layout around natural light and airflow — not bolting nature on as decoration afterward. Think:

    • Larger windows or French doors where structurally possible
    • Courtyard-style layouts in independent houses (a nod to old Rajasthani havelis, actually)
    • Living walls in balconies instead of scattered planters
    • Natural ventilation planning so ACs run less

    Picture a small business owner in Jaipur renovating an old haveli-style home. Instead of sealing up the central courtyard for extra room, more owners are now opening it back up — adding a skylight, some seating, a few climbers on the wall. It cuts the cooling load noticeably and the space just feels different to sit in.

    3. Multi-Functional Rooms Are No Longer Optional

    Featured snippet: Multi-functional room design in 2026 means spaces built to serve two or three purposes from day one — a guest room that’s also a home office, a dining nook that converts to a workspace — rather than converting rooms as an afterthought.

    Post-pandemic work habits stuck around. Nobody’s shocked by that anymore. But what has changed is how homes get planned from the start.

    Builders and designers are now sketching flexibility into floor plans before construction even begins. A spare bedroom gets a murphy bed and a built-in desk. A dining table doubles as a workstation with better task lighting overhead. It’s not glamorous, but it’s practical — and honestly, that’s what most Indian homeowners actually want anyway.

    Has your home office ever eaten into your dining table space and just… stayed there? You’re not alone.

    4. Warm Minimalism Over Stark White Boxes

    Pure white, all-glass minimalism had its moment. It’s cooling off, and I don’t think that’s a bad thing.

    What’s taking its place is warmer — terracotta tones, warm beige, muted greens, mixed with natural textures like jute and cane. It still feels clean and uncluttered, but it doesn’t feel clinical.

    This matters especially in Indian homes where stark white shows dust and scuffs fast, particularly in cities with heavy pollution. A warm off-white or greige base hides wear far better while still looking current.

    5. Smart Home Tech, But Simplified

    A few years back, “smart home” meant a dozen disconnected apps and a hub nobody understood. That’s finally getting fixed.

    Modern home design trends 2026 show a clear shift toward simplified, voice-and-app-integrated systems — lighting, security, and climate control on one platform instead of five. Matter-compatible devices are making this easier since they work across ecosystems without brand lock-in.

    [link to related guide on smart home upgrades here]

    Practical additions worth the money in 2026:

    • Motion-sensor lighting in passages and bathrooms (cuts electricity bills more than people expect)
    • App-controlled geysers, useful for winter mornings in North India
    • Video doorbells — increasingly common in gated communities and standalone houses alike

    6. Curved Furniture and Softer Architectural Lines

    Sharp, boxy furniture is giving way to curves — rounded sofa arms, arched doorways, oval dining tables. It’s a small shift, but it changes how a room feels to move through.

    I’ll admit this one straddles the line between trend and fad. Curved furniture can be pricier and harder to source locally, so I’d suggest picking one or two statement pieces — an arched mirror, a rounded coffee table — rather than redoing an entire room around it.

    7. Sustainable and Locally Sourced Materials

    Featured snippet: Sustainable home design in 2026 prioritizes locally sourced, low-impact materials — reclaimed wood, bamboo, fly-ash bricks, and regional stone — which cut both transport costs and environmental impact compared to imported alternatives.

    This isn’t just an eco-trend anymore; it’s becoming cost-sensible too. Fly-ash bricks, for instance, run cheaper than red clay bricks in most states now, and they insulate better against heat.

    Reclaimed wood furniture, once a niche choice, is showing up in mainstream stores. A reclaimed teak dining table might cost ₹45,000-70,000 depending on size — comparable to new teak, but with more character and a smaller footprint.

    8. Zoning Within Open Floor Plans

    Open floor plans aren’t going away, but the “one giant open box” version is being refined. Designers are using rugs, low partitions, level changes, and lighting to create defined zones without walling anything off.

    A single large living-dining space might now have:

    1. A rug anchoring the seating area
    2. A pendant light marking the dining zone
    3. A half-height shelf unit separating a reading nook

    It keeps the openness people want while avoiding that slightly awkward, undefined feeling a fully open room can have.

    FAQ: Modern Home Design Trends 2026

    Is quiet luxury the same as minimalism? Not quite. Minimalism is about having less stuff. Quiet luxury is about what you do have being genuinely well-made. You can have a minimalist room that’s still quiet luxury, or a fuller room that qualifies too — it’s about material quality, not quantity.

    What’s the most budget-friendly trend to try first? Warm minimalism, honestly. Repainting walls in a warmer tone and swapping a few accessories costs far less than structural changes like courtyard remodeling or curved furniture.

    Are these trends practical for rental apartments? Mostly yes. Lighting changes, furniture choices, textiles, and even removable wallpaper work fine in rentals. Structural biophilic changes obviously need ownership or landlord approval.

    Do smart home upgrades actually save money long-term? Motion sensors and app-controlled appliances can meaningfully cut electricity use over a year, especially in larger homes. The upfront cost pays back gradually, not instantly — so it depends on how long you plan to stay.

    Is curved furniture more expensive than standard pieces? Generally yes, by maybe 15-25%, mainly because it’s harder to manufacture and less commonly stocked locally. Custom orders push the price up further.

    Will these trends still be relevant in a few years? Some will stick — sustainable materials and multi-functional rooms address real, ongoing needs. Others, like curved furniture, may fade faster since they’re more aesthetic than functional. [link to related guide on timeless vs trendy design choices here]

    Final Thoughts

    If there’s one takeaway from all this, it’s that modern home design trends 2026 are less about chasing looks and more about homes that actually work for how people live now. Quiet luxury, biophilic layouts, multi-functional rooms — none of these are fads you’ll regret in two years.

    Don’t feel pressure to redo your whole house at once. Pick one or two trends that solve an actual problem in your home — maybe it’s better lighting, maybe it’s a room that finally pulls double duty — and start there. [link to related guide on budget home improvement ideas here] Small, deliberate changes tend to age a lot better than a full trend-driven overhaul anyway.

  • Budget Home Decor Ideas That Look Expensive

    Budget Home Decor Ideas That Look Expensive

    Someone once walked into my living room, looked around, and asked which interior designer I’d hired. I nearly laughed out loud. Most of that room came from local markets, a couple of clever swaps, and honestly, less money than a single fancy dinner out. That’s the whole promise behind good budget home decor ideas — you don’t need a big budget to make a room feel considered and put-together, you just need to know which few things actually move the needle.

    Here’s the thing nobody tells you at the start: expensive-looking homes usually aren’t full of expensive things. They’re full of a handful of well-chosen pieces, some smart lighting, and rooms that don’t feel cluttered. That’s genuinely achievable on almost any budget, in 2026 or any year.

    This isn’t a list of vague inspiration. It’s specific, practical stuff you can actually go do this weekend without draining your savings.

    Why Some Homes Look Expensive Without Actually Being Expensive

    A home looks expensive largely due to intentional curation — fewer, well-placed items, a cohesive color palette, and good lighting — rather than the actual cost of individual pieces. Clutter and mismatched styles read as cheap far more than budget furniture does.

    I think this is the single most misunderstood idea in home decor. People assume “expensive-looking” means expensive furniture, marble everything, designer labels. It doesn’t. It means restraint, mostly.

    A few things genuinely expensive-feeling homes tend to share:

    • A limited, cohesive color palette rather than a mismatched collection of whatever was on sale
    • Empty space that’s actually left empty, instead of filled with clutter just because there’s room
    • Good lighting that flatters the space rather than one harsh overhead bulb
    • A few statement pieces instead of many small, forgettable ones

    Once you internalize this, budget decorating stops feeling like a compromise. It’s actually a discipline that even people with big budgets often get wrong.

    Declutter First — It’s Free and It Works Instantly

    Before you buy a single new thing, clear out what’s not earning its place. This sounds too simple to matter, but I promise it’s the highest-impact, zero-cost step on this entire list.

    Removing excess clutter is the single most effective and completely free way to make any home feel more put-together and expensive, since visual chaos reads as cheap regardless of how much any individual item cost.

    Walk through each room and honestly ask: does this item add something, or is it just sitting there out of habit? Old newspapers, random cables, decor pieces you don’t even notice anymore — all of it adds visual noise.

    A few areas people consistently overlook:

    1. Kitchen counters — clear surfaces instantly look more polished than cluttered ones
    2. Coffee tables piled with remotes, mail, and random odds and ends
    3. Bookshelves crammed with things that aren’t actually books or intentional decor
    4. Entryway areas that collect shoes, bags, and keys in a visible pile

    Has this ever happened to you — cleaning up before guests arrive, and being surprised how much better the room suddenly looks, even though you didn’t buy or change anything? That’s decluttering doing all the work. It’s genuinely the cheapest decor upgrade available to anyone.

    Invest in Good Lighting, Not Just Overhead Bulbs

    Lighting quietly does more for a room’s perceived quality than almost any other single factor, and it’s a place where a small budget genuinely goes a long way.

    A single harsh ceiling light makes even beautifully furnished rooms feel flat and a bit cheap. Layered lighting — a floor lamp here, a small table lamp there — adds warmth and depth that instantly reads as more considered.

    Budget-friendly lighting moves worth making:

    • Swap harsh white bulbs for warm-toned LEDs; this alone changes a room’s whole mood, and it costs almost nothing
    • Add one floor lamp in a dim corner — decent options run ₹1,500-₹3,000 and make a visible difference
    • Use fairy lights or string lights along a shelf or headboard for a soft accent glow, especially popular for bedrooms
    • Position a lamp near your reading chair or sofa corner rather than relying only on the main light

    I’ve noticed people underestimate this category the most, probably because lighting feels functional rather than decorative. But walk into any well-designed hotel lobby and you’ll notice — it’s rarely one bright overhead light doing all the work.

    Use Mirrors and Reflective Surfaces Strategically

    Mirrors do double duty — they make rooms feel bigger and add a subtle sense of polish, often for less than you’d spend on a mid-range piece of wall art.

    A large, well-framed mirror placed thoughtfully — opposite a window, or as a statement piece above a console table — adds visual interest without the cost of actual artwork. Local markets and online furniture sites in India often have affordable, good-looking mirror options starting around ₹1,200-₹2,500 for a decent size.

    [link to related guide on small living room decorating ideas here]

    Beyond mirrors, small reflective touches — a brass or gold-toned vase, metallic photo frames, a glass-top side table — add a subtle shine that reads as more expensive than the actual price tag, especially when used sparingly rather than everywhere at once.

    Rearrange What You Already Own

    This might be the most underrated tip on this entire list, and it costs literally nothing.

    Sometimes the furniture you already have just needs a different arrangement to feel fresh. Try angling your sofa slightly instead of pushing it flat against a wall. Swap which room certain furniture pieces live in — that side table gathering dust in the bedroom might be exactly what your living room corner needs.

    A few rearranging ideas worth trying:

    • Group items in odd numbers (threes work particularly well) on shelves and tables — it reads as more intentional than pairs
    • Move larger furniture away from doorways to open up sightlines
    • Rotate decorative items between rooms every few months to keep spaces feeling fresh without buying anything new
    • Try a completely different furniture layout before assuming you need new pieces

    I did this myself last year — just moved my bookshelf to a different wall and swapped two chairs between rooms. Total cost: zero. The living room genuinely felt like a different space afterward.

    Add Texture Through Textiles

    Cushions, throws, and rugs are some of the cheapest ways to add visible richness to a room, and they’re easy to swap out seasonally without much cost.

    Layering different textures — a woven throw, patterned cushions, a textured rug — adds visual depth and warmth to a room at a fraction of what furniture upgrades would cost, and it’s one of the fastest budget home decor ideas to implement in a single afternoon.

    A few specific ideas:

    • Mix textures rather than matching everything perfectly — a smooth velvet cushion next to a woven jute one looks more curated than a matched set
    • A patterned dhurrie or handloom rug, widely available across Indian markets, adds warmth and color for relatively little cost, often ₹1,500-₹4,000 for a decent size
    • Swap thin, flat cushion covers for ones with visible texture or trim detail — it’s a small change that photographs and feels noticeably richer

    Picture a small business owner in Jaipur who redid her home office corner using nothing but a new dhurrie rug, two textured cushions, and a repositioned lamp. Total spend was under ₹4,000, and it completely changed how the corner felt to work in.

    Bring in Greenery — Cheap, Effective, and Forgiving

    Plants add life and color to a space in a way almost nothing else does at this price point. A few well-placed plants genuinely elevate how put-together a room feels.

    You don’t need rare, expensive plants either. Local nurseries in most Indian cities sell healthy, easy-care plants for ₹100-₹400, and a decent-looking pot to match can run anywhere from ₹150 to ₹600 depending on style.

    • Pick one or two low-maintenance varieties if you’re not confident with plant care — money plants, snake plants, and pothos are nearly impossible to kill
    • Vary pot heights and styles slightly rather than matching everything exactly
    • A single larger plant in a good pot often has more visual impact than several tiny scattered ones

    I do think there’s such a thing as overdoing this one, though — a room stuffed with plants everywhere can start feeling cluttered rather than curated. One or two thoughtfully placed plants beats ten scattered ones, in my honest opinion.

    Frame and Display What You Already Have

    Art doesn’t need to be expensive to look intentional. Old photographs, travel postcards, even fabric swatches from a favorite saree can become wall art with the right frame.

    [link to related article on interior painting cost and finishes here]

    A few low-cost display ideas:

    1. Create a small gallery wall using affordable frames from local markets — consistency in frame color matters more than matching every frame exactly
    2. Frame a piece of interesting fabric or a scarf instead of buying artwork
    3. Display a small collection of items you already own — vintage postcards, pressed flowers, small souvenirs — grouped together rather than scattered
    4. Use washi tape or removable adhesive strips for a no-damage gallery wall in rented apartments, which matters a lot for renters who can’t drill into walls

    The trick is presentation, not the item itself. A ₹50 postcard in a nice frame looks far more intentional than an expensive print with no frame at all, taped crookedly to a wall.


    Frequently Asked Questions

    What is the cheapest way to make my home look more expensive? Decluttering, without question. It costs nothing, takes an afternoon, and instantly changes how put-together a space feels — often more than any purchase would.

    Do budget home decor ideas actually work, or do rooms still look cheap? They genuinely work, as long as you focus on curation over quantity. A few well-chosen, well-placed items always look more expensive than a room crammed with many mismatched cheap ones.

    Where can I find affordable home decor items in India? Local markets, especially in cities like Jaipur, Delhi’s Sarojini Nagar, or Bangalore’s Commercial Street, along with online marketplaces, offer a huge range of budget-friendly decor, often at a fraction of branded home store prices.

    How much should I budget for a basic room refresh? A meaningful refresh — lighting, a rug, some cushions, a mirror — can realistically be done for ₹8,000-₹15,000 depending on room size, without touching furniture or paint.

    Does rearranging furniture really make a difference, or is that just a myth? It genuinely makes a difference. A new layout changes sightlines and how light moves through the room, which affects how spacious and considered the space feels, even with zero new purchases.

    What’s the biggest mistake people make with budget decorating? Buying too many small items instead of a few good ones. Scattered cheap decor pieces read as cluttered rather than curated, which works against the exact effect most people are trying to achieve.


    Conclusion

    Making a home look expensive really comes down to a handful of smart, low-cost moves — decluttering, better lighting, thoughtful textiles, and a few well-placed pieces instead of many scattered ones. None of the budget home decor ideas covered here need a big spend, just a little intention behind each choice.

    Pick one room this weekend and try just three of these ideas — declutter the surfaces, add a lamp, swap in a textured cushion or two. You’ll likely notice the difference before you’ve spent even ₹2,000, and that’s really the whole point.

  • Small Living Room Decorating Ideas to Make It Feel Bigger

    Small Living Room Decorating Ideas to Make It Feel Bigger

    Ever walked into a friend’s small flat and wondered how their tiny living room feels so much bigger than yours, even though the actual square footage is probably similar? That’s usually not luck. It’s a handful of deliberate choices, and once you know what they are, small living room decorating ideas stop feeling like a mystery and start feeling like a checklist you can actually work through this weekend.

    Most Indian city apartments deal with this exact challenge — 250, maybe 300 square feet of living space that somehow needs to fit a sofa, a TV unit, storage, and still feel like somewhere you’d want to sit and relax. I’ve lived in a couple of these compact flats myself, and trust me, the difference between a cramped-feeling room and an airy one usually comes down to five or six specific decisions, not some expensive renovation.

    This guide walks through what genuinely works — tested ideas, not just theory — to make a small living room feel noticeably more open.

    Why Small Rooms Feel Cramped in the First Place

    Small living rooms feel cramped mainly due to poor furniture scale, cluttered visual lines, dark colors, and inadequate lighting — not necessarily the actual square footage available. Understanding this shifts the fix from “I need more space” to “I need to use this space smarter.”

    Here’s something I’ve noticed after helping a few friends rearrange their flats: two rooms of identical size can feel completely different depending purely on furniture placement and color choices. The square footage rarely changes. The perception of space does.

    A few common culprits behind that cramped feeling:

    • Furniture that’s too bulky or too tall for the room’s proportions
    • Too many small, scattered decor pieces creating visual clutter
    • Dark or heavily patterned walls that visually shrink the space
    • Poor lighting that leaves corners dim and undefined
    • Furniture arranged to block natural walking paths through the room

    Fix even three or four of these, and the room genuinely starts to feel different, not because it got bigger, but because it stopped fighting against itself visually.

    Choose the Right Color Palette

    Color does more heavy lifting in a small space than almost anything else on this list. Light, soft tones reflect more light and visually push walls outward, while dark colors, however beautiful, tend to close a small room in.

    Light neutral colors — soft whites, warm beiges, pale greys — remain the most reliable choice for small living rooms because they reflect available light and create an airy, expansive feel without limiting furniture or decor choices.

    That said, I don’t think small rooms need to be entirely colorless. One accent wall in a slightly deeper tone, especially behind the sofa, can add character without making the room feel boxed in. The key is restraint — one bold surface, not four.

    [link to related guide on how to choose paint color for every room here]

    A few practical color tips:

    1. Stick to a maximum of two to three colors across walls, furniture, and decor to avoid visual chaos
    2. Use the ceiling color to your advantage — a soft white ceiling, even slightly lighter than the walls, adds perceived height
    3. If you love bold color, save it for cushions, curtains, or a single accent piece rather than entire walls

    Pick Furniture That Fits the Room’s Scale

    This is where a lot of small living rooms go wrong, and honestly, it’s an easy mistake to make. That gorgeous oversized sofa looks amazing in the showroom. In a 250 sq ft living room, it eats the whole space and leaves nowhere to walk.

    Scale matters more than style here. A few things to keep in mind:

    • Choose a sofa with slim arms and visible legs rather than a bulky, low-to-the-ground design — visible floor space underneath furniture makes a room feel more open
    • Skip the oversized coffee table; a smaller round or nesting table takes up less visual weight
    • Multi-functional furniture genuinely earns its keep in small spaces — a storage ottoman, a sofa bed for guests, a console table that doubles as a workspace
    • Measure before you buy, always. It sounds obvious, but I’ve seen too many people fall in love with a piece at the store without checking if it’ll actually leave enough walking space once it’s home

    Picture a couple in a 1BHK in Pune trying to fit a sectional sofa meant for a much bigger room. It technically fit, but it blocked the balcony door and left barely 18 inches to walk around. They swapped it for a compact two-seater with a single accent chair, and the whole room suddenly had breathing space again — same square footage, completely different feel.

    Use Mirrors to Trick the Eye

    An old trick, but it genuinely works, and it’s one of the cheapest fixes on this entire list.

    A large mirror placed opposite a window reflects natural light deeper into the room and visually doubles the sense of openness. Even without a window nearby, a well-placed mirror on a main wall creates depth that a flat wall simply doesn’t offer.

    • One large statement mirror generally works better than several small ones scattered around
    • Position it to reflect something pleasant — a window, a plant, an interesting piece of art — rather than a blank wall or clutter
    • Mirrored furniture, like a mirrored console table, adds the same light-bouncing effect in a more subtle way

    I’ll be honest, I was skeptical of this trick for years, thought it was more decorating myth than real technique. Then I actually tried it in my own living room, and the difference in how bright and open the space felt was more noticeable than I expected. Worth trying before you dismiss it.

    Maximize Vertical Space With Smart Storage

    When floor space is limited, shifting storage vertically — tall, narrow shelving units, wall-mounted cabinets, and floor-to-ceiling bookshelves — keeps clutter off the ground and draws the eye upward, making the room feel taller and more spacious.

    Horizontal clutter is the enemy of a small living room. Every low cabinet, every stack of magazines on the floor, every scattered box eats into your visual floor space, which is exactly what makes a small room feel smaller than it is.

    Ideas worth considering:

    • Wall-mounted shelves instead of bulky bookcases sitting on the floor
    • A TV unit with closed storage rather than open shelving that shows every cable and remote
    • Tall, narrow bookshelves that use height rather than floor width
    • Hooks or a slim wall-mounted organizer near the entrance for bags, keys, and everyday clutter

    Vertical storage does double duty — it hides mess and draws the eye upward, which subtly makes ceilings feel higher than they actually are. Small change, surprisingly big visual payoff.

    Let There Be Light — Layered Lighting Matters

    Dim, single-source lighting is one of the fastest ways to make a small room feel smaller and gloomier than it actually is. Good lighting design, on the other hand, genuinely transforms how a compact space reads.

    Aim for layered lighting rather than relying on one central ceiling light:

    • A floor lamp in one corner for ambient warmth
    • Task lighting near reading or work areas
    • Accent lighting, like a small table lamp, to add depth and warmth to darker corners
    • Keep window treatments light and sheer where privacy allows, so natural daylight isn’t blocked unnecessarily

    Has this ever happened to you — walking into a room lit only by one harsh overhead bulb, and instantly feeling like the walls are closing in? Layered lighting fixes that instantly, and it’s genuinely one of the more affordable upgrades on this whole list. A couple of decent floor lamps can transform a room for under ₹5,000.

    Keep Sightlines Open

    This one’s less about individual pieces and more about the overall flow of the room, and it’s honestly the concept most decorating guides skip entirely.

    A sightline is simply the unobstructed view across a room — from the entrance to the far wall, for instance. The longer and clearer that view, the bigger the room feels, regardless of actual square footage.

    Practical ways to keep sightlines open:

    1. Avoid placing tall furniture directly in the entrance’s line of sight
    2. Choose furniture with open bases (legs, not solid panels) so the eye can travel underneath
    3. Keep the center of the room relatively clear rather than filling every gap with decor
    4. If you have a balcony or window at the far end, keep that view unobstructed — it extends the room visually beyond its actual walls

    I think this is genuinely the most underrated concept in small-space decorating. People focus so much on individual furniture pieces, they forget to step back and check whether the whole room reads as open or chopped up into blocked visual segments.

    Add Greenery Without Overcrowding

    Plants add life to any room, but in a small living room, the way you use them matters more than in a larger space.

    Skip the temptation to fill every corner with pots. A couple of well-placed plants — one taller floor plant in a corner, maybe a smaller trailing plant on a shelf — add warmth without contributing to clutter. Too many small pots scattered around actually work against the open feeling you’re trying to create.

    [link to related article on best flooring options for compact homes here]

    Tall, narrow plants like a snake plant or areca palm work particularly well in small spaces since they add height and greenery without eating up floor width the way a wide, bushy plant would.


    Frequently Asked Questions

    What color makes a small living room look bigger? Light, soft neutrals like warm whites, pale beiges, and light greys work best, since they reflect more natural light and don’t visually shrink the walls the way darker, saturated colors tend to.

    Should I avoid rugs in a small living room? Not at all — a rug can actually help define the space, but choose one large enough that furniture legs sit on it, rather than a small rug that makes the room feel chopped into pieces.

    Is it better to push furniture against the walls in a small room? Usually yes, since it opens up the center of the room and improves overall flow. That said, floating a piece slightly forward with legs visible can sometimes look more intentional than jamming everything flush against every wall.

    How many pieces of furniture should a small living room have? Keep it minimal — a sofa, one or two seating pieces, a compact coffee table, and one storage unit is usually enough. Overcrowding a small space with too many furniture pieces defeats every other effort to make it feel open.

    Do curtains affect how big a small living room feels? Yes, more than people expect. Light, sheer curtains that let daylight through help a lot, and hanging curtain rods closer to the ceiling rather than right above the window frame creates an illusion of higher ceilings too.

    Can wallpaper work in a small living room, or should I stick to paint? Wallpaper can work beautifully as a single accent wall with a subtle, light-toned pattern. Avoid covering all four walls with busy or dark wallpaper, since that tends to visually shrink the room rather than open it up.


    Conclusion

    Making a compact space feel open really comes down to a handful of deliberate choices — the right color palette, properly scaled furniture, smart vertical storage, and lighting that actually fills the room instead of leaving corners dim. None of these small living room decorating ideas require a full renovation or a huge budget; most of them are rearrangement, smart furniture swaps, and a bit of intentional planning.

    Pick two or three ideas from this list that feel most doable for your space this month, rather than trying to overhaul everything at once. Even swapping your lighting or repositioning one bulky piece of furniture can noticeably change how your living room feels to walk into.

  • Interior Painting Cost Guide: What Homeowners Should Budget For

    Interior Painting Cost Guide: What Homeowners Should Budget For

    Ask five different painters for a quote and you’ll probably get five different numbers, none of which quite explain themselves. That’s the frustrating reality of figuring out interior painting cost in India — there’s no single fixed rate, and most contractors won’t break down exactly what you’re paying for unless you push them to.

    I went through this exact confusion last year repainting a 2BHK flat. One quote came in almost double another for what seemed like the same job. Turned out the cheaper one was using a lower-grade paint and skipping a coat of primer — details that don’t show up until you ask directly.

    This guide breaks down what actually goes into your final bill, room by room, so you’re not caught off guard when the quotes start coming in. By the end, you’ll have a realistic number to work with, not just a vague range.

    What Actually Determines Interior Painting Cost?

    Interior painting cost in India typically depends on four main factors: the paint quality chosen, the total wall area to be covered, the number of coats required, and labor charges, which vary significantly by city and contractor experience. Understanding these upfront helps you compare quotes properly.

    A lot of homeowners just look at the final rupee figure without understanding what’s baked into it, and that’s exactly how you end up comparing two wildly different quotes as if they’re for the same job.

    Here’s what’s actually in play:

    • Paint brand and grade — economy, premium, and luxury paints can differ by 3-4x in price per liter
    • Wall condition — cracked, uneven, or previously damaged walls need extra prep work, which adds to labor cost
    • Number of coats — most jobs need 2 coats minimum, sometimes 3 for color changes from dark to light
    • Ceiling work — often priced separately from walls, and easy to miss when budgeting
    • City and contractor rates — labor costs in Mumbai or Bangalore run noticeably higher than in smaller cities

    Get quotes that spell out each of these separately, not just one lump figure. It makes comparing contractors so much easier, and it’s honestly the biggest lesson I took away from my own painting project.

    Average Cost Per Square Foot

    This is usually the number people search for first, so let’s get straight into it.

    For a standard interior paint job in India, expect to pay:

    1. Economy/distemper paint: ₹12-₹18 per sq ft (labor + material)
    2. Mid-range emulsion paint: ₹20-₹30 per sq ft
    3. Premium emulsion (washable, better finish): ₹32-₹45 per sq ft
    4. Luxury/textured finishes: ₹50-₹90+ per sq ft, depending on the texture technique used

    These figures usually cover two coats of paint plus basic wall prep — filling minor cracks, light sanding, one coat of primer. If your walls need heavier repair work, expect the number to climb.

    Note that “per square foot” here typically refers to the painted surface area, not your home’s carpet area. A 1000 sq ft flat doesn’t mean 1000 sq ft of wall paint — actual wall surface area, once you account for windows, doors, and room height, usually comes out lower than the carpet area, though ceilings add it back if you’re painting those too.

    Room-by-Room Cost Breakdown

    Numbers feel more useful when they’re tied to actual rooms rather than abstract per-square-foot rates, so here’s a rough breakdown for a typical mid-range Indian home.

    Living room (roughly 200 sq ft floor area): Wall paint alone typically runs ₹15,000-₹28,000 with mid-range emulsion, two coats. Add ceiling work and it climbs to ₹20,000-₹35,000.

    Bedroom (roughly 120 sq ft floor area): Expect ₹9,000-₹16,000 for walls with mid-range paint. Smaller room, obviously lower total cost, though the per-square-foot rate stays the same.

    Kitchen (roughly 80-100 sq ft): Because kitchens often need moisture-resistant or washable paint, costs run slightly higher per square foot — figure ₹8,000-₹15,000 depending on finish quality.

    Bathroom (roughly 40-50 sq ft): Smaller area but again needs specialized moisture-resistant paint, so cost per square foot is higher. Typically ₹4,000-₹8,000 for a standard bathroom.

    For a full 2BHK flat (roughly 800-900 sq ft carpet area), total interior painting cost usually lands somewhere between ₹45,000 and ₹90,000 depending on paint grade chosen, with 3BHK homes running proportionally higher, often ₹70,000-₹1,40,000.

    [link to related guide on choosing paint colors for every room here]

    Paint Quality Tiers — What You’re Actually Paying For

    Not all paint is created equal, and this is where a lot of the price variation comes from. It’s worth understanding the tiers before you let a contractor pick for you.

    Distemper paints sit at the bottom of the price range. They’re cheap, but they don’t hold up particularly well — lower washability, shorter lifespan, usually needing a repaint within 3-4 years. I’d only recommend these for rental properties or very tight budgets, honestly.

    Emulsion paints are the mid-range standard most homeowners land on, and reasonably so. Better washability, more color options, and a lifespan of 5-7 years before needing a refresh. This is where most quality-conscious budgets should sit.

    Premium and luxury paints — think higher-end lines from major brands — offer better stain resistance, smoother finish, and often longer warranties, sometimes 7-10 years. Whether the extra cost is worth it depends on how long you’re planning to stay in the home and how much finish quality matters to you personally.

    My honest take: for a rental or a home you’re planning to sell within a few years, mid-range emulsion is the sweet spot. Splurging on luxury paint rarely pays back in resale terms. But for a long-term family home, especially high-traffic rooms like the living room or kids’ bedrooms, the extra durability of premium paint genuinely earns its cost over time.

    Hidden Costs People Forget to Budget For

    Beyond the base painting quote, homeowners commonly forget to budget for wall repair work, furniture shifting and covering, primer costs on new or heavily stained walls, and post-painting cleanup — which together can add 10-20% to the initial estimate. Always ask contractors to itemize these separately.

    A few specific things that catch people off guard:

    • Crack filling and putty work — if your walls have visible cracks, this is often quoted separately and can add ₹3-₹8 per sq ft
    • Primer coat — necessary for new walls or major color changes, sometimes bundled in, sometimes not, so always confirm
    • Furniture moving and covering — some contractors include this, others charge extra or expect you to handle it yourself
    • Scaffolding for high ceilings — relevant for double-height living rooms, adds a noticeable chunk to labor cost
    • Cleanup and disposal — paint drips, plastic sheeting, leftover material — worth confirming who’s responsible for this

    Picture a small business owner in Jaipur repainting the ground floor of his home, which doubles as a small retail shop. His initial quote didn’t include crack filling for a few damaged patches near the shop entrance, and that added almost ₹6,000 to the final bill that he hadn’t planned for. A quick conversation upfront with the contractor would’ve avoided the surprise entirely.

    How to Get an Accurate Quote (Without Getting Overcharged)

    Getting three quotes is the standard advice, and it’s still good advice, but the way you get those quotes matters more than the number of them.

    Steps that actually help:

    1. Ask for a written, itemized quote — paint brand, number of coats, prep work included, labor charges separately
    2. Confirm the exact paint variant, not just the brand — the same brand has economy, mid-range, and premium lines with very different pricing
    3. Get the wall area measured properly rather than accepting a rough estimate based on your flat’s carpet area
    4. Ask about warranty terms — some paints come with a 5-7 year warranty against peeling or fading, which matters for long-term value
    5. Clarify who handles furniture moving, covering, and post-work cleanup

    Has this ever happened to you — getting a suspiciously low quote, only to find out later it excluded half the work you assumed was included? That’s exactly why itemized quotes matter so much. A cheap quote that leaves out crack filling and primer isn’t actually cheap once you add those back in.

    DIY vs Hiring a Professional Painter

    This is worth a genuine, honest look, because DIY painting has gotten more popular, especially for smaller jobs like a single accent wall or a kids’ room.

    DIY painting can save significantly on labor cost — often 40-50% of the total bill — but it demands real time, patience, and a decent amount of skill for a clean finish. Cutting in around edges, avoiding roller marks, and getting even coverage takes more practice than people expect on their first attempt.

    Professional painters cost more, obviously, but bring speed, consistent finish quality, and proper prep work that’s easy to skip when doing it yourself — like sanding, priming, and taping edges cleanly.

    My honest take: for a single small room or an accent wall, DIY is genuinely worth trying if you’ve got a free weekend and don’t mind some trial and error. For a full home repaint, especially with ceiling work and multiple rooms, hiring a professional is almost always worth the cost difference. The time saved and the finish quality gap are both significant.

    [link to related article on roof and home maintenance tips here]


    Frequently Asked Questions

    What is the average interior painting cost for a 2BHK flat in India? For a mid-range paint job, expect somewhere between ₹45,000 and ₹90,000 for a typical 2BHK, depending on the paint quality chosen and how much wall repair work is needed beforehand.

    Does interior painting cost include ceiling painting? Not always. Many contractors quote wall and ceiling painting separately, so always confirm whether the ceiling is included in your quote or needs to be added on.

    How can I reduce my interior painting cost without sacrificing quality? Stick with mid-range emulsion paint rather than luxury finishes, get your walls properly prepped in advance to reduce labor time, and consider doing minor prep work like furniture moving yourself.

    How often should interior walls be repainted? Emulsion paints typically need a repaint every 5-7 years, while distemper paints wear faster, often needing a refresh within 3-4 years. High-traffic rooms may need touch-ups sooner.

    Is it cheaper to paint the whole house at once or room by room? Painting the whole house at once is usually cheaper per square foot, since contractors often reduce labor rates for larger jobs and you save on repeated setup and material delivery costs.

    Do painting quotes usually include material cost, or is that separate? Most quotes bundle material and labor together, but always confirm this explicitly. Some contractors quote labor only and expect you to purchase paint separately, which changes your total budget significantly.


    Conclusion

    Budgeting for interior painting cost doesn’t have to feel like guesswork once you know what actually goes into the final number — paint quality, wall condition, coats needed, and labor rates in your city. Get itemized quotes, ask the right questions upfront, and you’ll avoid the surprise add-ons that catch so many homeowners off guard.

    Before you call your first contractor, measure your rooms and decide on your paint quality tier ahead of time. Walking in with that clarity puts you in a much stronger position to compare quotes fairly and negotiate with confidence.

  • How to Choose the Right Paint Color for Every Room in Your House

    How to Choose the Right Paint Color for Every Room in Your House

    Standing in a paint shop staring at a wall of color swatches, feeling completely overwhelmed — has this ever happened to you? You’re not alone. Figuring out how to choose paint color for an entire house is one of those decisions that feels simple until you’re actually holding forty shades of “off-white” and can’t tell them apart anymore.

    I’ve repainted my own home twice now, and both times I underestimated how much lighting, room size, and even furniture color would affect the final result. A shade that looked perfect on the swatch card looked completely different once it covered four walls under our living room’s lighting.

    This guide walks through picking colors room by room, based on how each space actually gets used — not just what looks trendy in a magazine spread. Because a color that works beautifully in a bedroom might feel completely wrong in a kitchen, and there are real reasons for that.

    Start With How Each Room Actually Gets Used

    Choosing paint color starts with understanding a room’s function and mood before its aesthetics — energizing colors work well in kitchens and home offices, while calming tones suit bedrooms, and social spaces like living rooms can handle bolder choices. Function should guide color, not the other way around.

    This sounds obvious written out, but it’s the step most people skip. They pick a color they love in isolation — say, a rich navy blue — without asking whether that color actually suits how the room gets used day to day.

    A few questions worth asking before you even look at swatches:

    • Is this a room you relax in, or one where you need to feel alert and focused?
    • Does natural light flood the space, or is it mostly artificial lighting?
    • How much time do guests actually spend in this room versus just family?
    • Will this color still feel right in five years, or is it chasing a current trend?

    I’ll admit a personal bias here — I think too many homeowners lean toward whatever’s trending on Pinterest without asking if it actually fits their lifestyle. A moody dark green bedroom looks stunning in photos. Living with it every single morning when you’re trying to wake up is a different experience entirely.

    Understanding Undertones — The Detail Everyone Misses

    This is genuinely the single biggest reason paint jobs go wrong, and almost nobody talks about it until it’s too late.

    Every paint color, even a seemingly simple white, has an undertone — a subtle hint of another color hiding underneath. Whites can lean yellow, pink, grey, or blue. Beiges can lean green, pink, or grey. You often can’t tell just by looking at a small swatch card.

    Undertones become obvious once paint is on a full wall, especially under natural daylight, and mismatched undertones between adjacent rooms or against your flooring and furniture is one of the most common paint color mistakes homeowners make.

    Here’s a practical way to test for undertones before committing:

    1. Buy a small sample pot, not just the swatch card
    2. Paint a section directly on your wall — at least a two-foot square, not a tiny patch
    3. Look at it at different times of day: morning, afternoon, evening under artificial light
    4. Compare it against your existing flooring, furniture, and curtains in the room

    Skipping this step is exactly how people end up with a “white” living room that looks faintly greenish next to their marble flooring. It’s a frustrating, expensive mistake to fix after the fact.

    Living Room: Balancing Warmth and Versatility

    The living room usually sees the most foot traffic and the widest range of activities — family time, guests, kids playing, maybe even a home office corner. That versatility should guide your color choice.

    Warm neutrals work beautifully here — think soft beiges, warm greys, or a muted taupe. They’re flexible enough to work with almost any furniture and décor style, and they don’t date quickly the way trendier colors sometimes do.

    If you want more personality, one accent wall in a deeper tone — a muted terracotta, a soft sage green, a warm charcoal — adds character without overwhelming the room. I genuinely think a single well-chosen accent wall does more for a living room’s character than an all-over bold color choice, which can start to feel heavy after a while.

    For smaller living rooms, lighter shades help the space feel bigger, especially important in compact city apartments where every square foot matters. [link to related guide on paint colors that increase home resale value here]

    Bedrooms: Prioritize Calm Over Trendy

    For bedrooms, soft cool tones like muted blues, sage greens, and gentle greys tend to promote a more restful atmosphere, while warm neutrals like soft terracotta or blush also work well for a cozy, grounding feel. The goal is calm, not visual excitement.

    A bedroom is fundamentally different from every other room in the house — it’s where you’re trying to unwind and sleep, not entertain or stay energized. Bright, saturated colors that work great in a living room can feel jarring in a space meant for rest.

    That said, I don’t think bedrooms need to be boring either. A deep, moody navy or forest green can feel genuinely luxurious and restful if done well, especially paired with warm lighting and soft textiles. It’s not about avoiding all depth of color, it’s about avoiding anything visually loud or high-energy.

    Avoid, generally:

    • Bright reds or oranges — energizing colors, wrong mood for a bedroom
    • Stark, cold whites, which can feel clinical rather than cozy
    • Anything too saturated on all four walls, which can feel overwhelming rather than calming

    Kitchen: Energy Meets Practicality

    Kitchens need a slightly different approach because of grease, moisture, and constant cleaning — practical concerns that matter as much as aesthetics here.

    Go for a paint with a semi-gloss or satin finish rather than matte, since it holds up better to cleaning and resists moisture more effectively. Color-wise, warm whites, soft yellows, and light sage greens are popular for good reason — they keep the space feeling bright and energizing, which matters for a room where you’re often up early or cooking late.

    Picture a small business owner in Jaipur who runs a home bakery out of her kitchen. She went with a warm buttery yellow a few years back, specifically because it felt cheerful during long early-morning baking sessions. Small detail, but it genuinely changed how the space felt to work in every day.

    Bolder kitchen colors — deep blues, forest greens on cabinetry especially — have become popular recently too, and they can look stunning if the rest of the kitchen has enough light and neutral surfaces to balance them out.

    Bathrooms: Light, Fresh, and Moisture-Resistant

    Bathroom paint choices should prioritize moisture-resistant finishes alongside color — light blues, soft greens, and warm whites work particularly well, paired with a mildew-resistant, semi-gloss or high-gloss paint suited for humid environments.

    Moisture is the real enemy in bathrooms, so whatever color you land on, don’t skip the practical side of the decision. A beautiful color choice with the wrong finish will peel or develop mildew spots within a year or two in a humid Indian bathroom.

    For smaller bathrooms, which describes most Indian homes honestly, lighter colors genuinely help the space feel less cramped. Soft aquas, pale greys, and warm whites are reliable choices that photograph well too if you’re planning to sell eventually.

    If your bathroom gets good natural light, you have more flexibility to go slightly bolder — a deeper teal or navy can look striking without making the space feel smaller, since natural light balances out the visual weight.

    Home Office or Study: Focus-Friendly Colors

    More people are working from home now than a few years back, and the paint color in that space genuinely affects focus and mood over long stretches of time.

    Cooler tones — soft blues, muted greens, light greys — tend to support concentration better than warm, energizing colors that are great for social spaces but can feel distracting during long work sessions.

    • Soft blue: associated with calm focus, good for tasks requiring sustained concentration
    • Muted green: balances energy and calm, a solid all-around choice for a home office
    • Light grey: neutral and professional-feeling, works well for video calls too since it doesn’t clash with most backgrounds

    Avoid very dark or saturated colors in a small home office, especially if the room doesn’t get much natural light — it can start to feel closed-in over an eight-hour workday.

    Testing Colors the Right Way Before You Commit

    Don’t trust the swatch card. I really can’t emphasize this enough, because it’s the mistake that leads to the most repainting regret.

    A color that looks lovely on a 2×2 inch card can look completely different across an entire wall, under your specific lighting, next to your existing furniture. Lighting changes everything — a north-facing room and a south-facing room will make the exact same paint color look noticeably different.

    Steps for testing properly:

    1. Buy small sample pots of your top 2-3 choices, not just one
    2. Paint large swatches directly on the wall, at least 2×2 feet, in different corners of the room
    3. Observe them across a full day — morning light, afternoon, and evening with your regular lights on
    4. Live with the samples for at least 2-3 days before deciding, rather than choosing on day one

    [link to related article on interior paint finishes and their uses here]

    It feels like an extra, tedious step when you’re eager to get started. But it’s genuinely the difference between loving your walls for years and repainting again within twelve months because the color felt wrong the moment it dried.


    Frequently Asked Questions

    What’s the best paint color for a small room to make it look bigger? Light, cool-toned neutrals — soft whites, pale greys, light blues — reflect more light and create a sense of openness. Avoid dark, saturated colors in small spaces, since they tend to make walls feel like they’re closing in.

    How do I choose a paint color that matches my furniture? Bring a fabric swatch or photo of your furniture to the paint store, and test your shortlisted colors against it in natural light at home before deciding. Undertones matter more here than the color name suggests.

    Should all rooms in my house have the same paint color? Not necessarily, though a consistent color palette or family of tones across connected spaces creates a more cohesive flow. Individual rooms like bedrooms or a home office can differ more freely since they’re separate, private spaces.

    What paint finish should I use in high-humidity rooms like bathrooms? Semi-gloss or high-gloss finishes hold up best against moisture and are easier to clean, which matters a lot in bathrooms and kitchens where humidity and grease are constant factors.

    How many paint samples should I test before deciding? Two to three shortlisted colors is usually enough. Testing more than that tends to create decision fatigue without meaningfully improving the outcome — trust your instinct once you’ve narrowed it down.

    Do darker paint colors make a room feel smaller? Generally yes, though not always negatively — a dark, moody color in a room with good natural light and minimal furniture can feel cozy and intentional rather than cramped. It really depends on the room’s lighting and purpose.


    Conclusion

    Figuring out how to choose paint color for your whole home doesn’t need to feel overwhelming once you break it down room by room. Match the color to how each space gets used, always account for undertones, and never skip testing samples directly on your walls before committing to gallons of paint.

    Pick one room to start with this weekend — maybe the one that’s bothered you the longest — and just test two or three sample pots on the wall. You’ll likely find the right shade faster than you expect once you stop trying to decide everything at once.

  • Hardwood vs Laminate Flooring: Which One Should You Choose?

    Hardwood vs Laminate Flooring: Which One Should You Choose?

    Standing in a flooring showroom, staring at two samples that look almost identical, wondering why one costs four times the other — sound familiar? That’s the hardwood vs laminate flooring dilemma in a nutshell, and honestly, most people walk in without a clear answer and walk out even more confused.

    I get why. Laminate has gotten so good visually that telling it apart from real wood, at least from a sample chip, is genuinely tough these days. But the differences that matter aren’t visible on a small sample — they show up years later, in how the floor wears, feels, and holds up to your actual daily life.

    This comparison isn’t going to tell you one is universally “better.” Because it isn’t that simple. It depends on your budget, your household, and honestly, how much you care about having “real” wood underfoot versus a good imitation.

    What’s the Real Difference Between Hardwood and Laminate?

    Hardwood flooring is made from solid, natural wood planks, while laminate is a synthetic product with a photographic wood-look layer over a composite core. The core difference shapes everything else — cost, durability, repairability, and how each performs over time.

    Solid hardwood is exactly what it sounds like — a single piece of wood, milled and finished, nothing else layered underneath. What you see is genuinely what you’re walking on.

    Laminate, on the other hand, is built from layers: a high-density fiberboard core, a printed image layer that mimics wood grain, and a protective top coat. It’s a manufactured product designed to look like wood, not actually made from it.

    This one distinction explains almost every trade-off in this comparison. Hardwood costs more because it’s a natural material with limited supply and more labor-intensive processing. Laminate is cheaper because it’s manufactured at scale using far less actual wood.

    Neither is “fake” in a bad sense, to be clear — laminate technology has come a long way, and a good laminate floor looks genuinely convincing. But they’re fundamentally different products, and that matters when you’re deciding what fits your home.

    Cost Comparison — Where the Real Gap Shows Up

    This is usually the deciding factor for most Indian homeowners, and fair enough — the price difference between hardwood and laminate isn’t small.

    Solid hardwood flooring in India typically runs ₹250 to ₹600+ per square foot, depending on the wood species, with premium options like teak going even higher. Add installation costs, and a mid-sized living room can easily cross ₹1.5-2 lakh.

    Laminate, by contrast, sits comfortably in the ₹60-₹150 per square foot range, including a much simpler installation process. That same living room might cost a third of what hardwood would, sometimes less.

    Here’s a rough breakdown for a 200 sq ft living room:

    • Solid hardwood (mid-range): ₹70,000-₹1,20,000 including installation
    • Laminate (mid-range): ₹18,000-₹35,000 including installation
    • Engineered wood, as a middle option: ₹40,000-₹70,000

    That gap is significant enough that for a lot of families, the decision practically makes itself on budget alone. But I’d caution against choosing purely on upfront cost — factor in how long each option realistically lasts, because that changes the math quite a bit.

    Durability — Which One Actually Holds Up Longer?

    Hardwood flooring, when properly maintained, can last 50 years or more and be refinished multiple times, while laminate typically lasts 15-25 years and cannot be refinished once its top layer wears through. This long-term difference matters a lot for durability-focused decisions.

    Hardwood’s biggest advantage is that it ages rather than degrades, if that makes sense. Scratches and dents can be sanded out and refinished, sometimes multiple times over the wood’s life. A hardwood floor that looks tired after 15 years of heavy use can genuinely look brand new again after refinishing.

    Laminate doesn’t have that option. Once its protective top layer wears through — usually from years of foot traffic, dragged furniture, or pet claws — the printed design layer underneath gets exposed and damaged. At that point, you’re not refinishing, you’re replacing.

    That said, I don’t want to oversell hardwood’s durability either. It’s not invincible. Water damage is a real weak point — a leaking pipe or a persistent spill can warp hardwood badly, and repairs aren’t cheap. Laminate, ironically, sometimes handles minor spills a bit better in the short term, though it’s still not fully water-resistant.

    So the honest answer: hardwood wins on long-term durability and repairability, laminate holds its own reasonably well for a decade or two before needing full replacement.

    Maintenance and Day-to-Day Upkeep

    Neither option is high-maintenance in the sense of needing constant attention, but they do need different things.

    Hardwood upkeep:

    • Regular sweeping or vacuuming to prevent grit from scratching the surface
    • Occasional polishing, roughly once or twice a year, to maintain the finish
    • Refinishing every 10-15 years depending on wear
    • Prompt cleanup of any spills — standing water is genuinely damaging

    Laminate upkeep:

    • Sweeping and damp mopping is generally enough for regular cleaning
    • No polishing or refinishing needed, ever, since it simply gets replaced when worn
    • Spills should still be wiped quickly, though laminate tolerates brief exposure a bit better than raw hardwood
    • Avoid excessive water when mopping — a slightly damp cloth is safer than a wet one

    Honestly, day-to-day, laminate is the lower-effort option. You’re not polishing it, you’re not worrying about refinishing schedules. For a busy household that doesn’t want another maintenance task on the calendar, that’s a real point in laminate’s favor.

    Comfort, Sound, and How Each Feels Underfoot

    This part doesn’t get talked about enough, but it genuinely affects how much you enjoy living with your floor day to day.

    Hardwood has a certain solidity underfoot — a firm, warm feel that a lot of people describe as more “grounded.” It also tends to insulate better against cold compared to tile, which matters in northern Indian winters especially.

    Laminate can feel slightly hollow by comparison, particularly cheaper variants installed without a proper underlay. Walking across it sometimes produces a faint echo or click sound that hardwood doesn’t have. Better-quality laminate with a good underlay minimizes this significantly, so it’s worth not skimping here if you go the laminate route.

    Picture a family in Jaipur choosing flooring for their first-floor bedroom, right above a noisy street-facing living room. They went with laminate for budget reasons, and while it looked lovely, the hollow sound underfoot bothered them more than expected during the first few months. A thicker underlay fixed most of it, but it’s a detail easy to overlook until you’re actually living with the floor.

    Which One Adds More Resale Value?

    Real estate agents will tell you this pretty consistently: hardwood flooring tends to be viewed more favorably by buyers, particularly in premium property segments. It signals quality and permanence in a way laminate, fairly or not, doesn’t quite match.

    That said, I don’t think this should be the deciding factor for everyone. If you’re planning to live in the home for decades and aren’t particularly focused on resale, the day-to-day practicality of laminate might matter more than a marginal resale bump.

    [link to related guide on flooring choices that boost home resale value here]

    For premium homes or properties in high-value markets, hardwood is often worth the investment purely from a resale standpoint. For mid-range family homes where budget matters more, laminate’s practicality tends to win out, and buyers in that segment aren’t typically penalizing a well-installed laminate floor either.

    Environmental Considerations

    Not something everyone thinks about, but worth a mention. Solid hardwood, sourced responsibly, is a natural, biodegradable material, though deforestation concerns are real if the sourcing isn’t sustainable. Look for certified sustainable sourcing if this matters to you.

    Laminate, being a composite manufactured product, involves more synthetic materials and isn’t biodegradable in the same way. It’s also generally not something that can be meaningfully recycled once it’s worn out — it typically ends up as waste.

    Neither is perfect on this front, honestly, but if sustainability plays into your decision, hardwood from a certified sustainable source is the stronger choice environmentally.

    Making the Final Call: Which Should You Choose?

    If budget allows and you’re planning to stay in your home long-term, hardwood is generally the better investment thanks to its durability and refinishing option. If budget is tighter or you want lower-maintenance flooring, laminate offers strong value without dramatically compromising on looks.

    A few quick scenarios to help decide:

    1. Long-term homeowner, budget flexible: Go hardwood. The upfront cost pays off over decades, especially with refinishing.
    2. Renting or planning to move within 5-7 years: Laminate makes more financial sense — no point over-investing in a space you won’t stay in long.
    3. Household with young kids or pets, tighter budget: Laminate, though be prepared it might need replacing sooner than hardwood would in the same conditions.
    4. Prioritizing resale value in a premium property: Hardwood, since buyers in that segment tend to value it more.

    [link to related article on flooring options for high traffic homes here]

    Has this ever happened to you — falling in love with a sample in the showroom, only to second-guess it once you’re actually staring at the price tag for your whole house? Take a breath, measure your actual square footage, and run the real numbers before deciding. It changes the picture more often than people expect.


    Frequently Asked Questions

    Is laminate flooring as good as hardwood? Not exactly as good, but “good enough” for a lot of households, especially budget-conscious ones. It looks convincingly similar but falls short on long-term durability and can’t be refinished the way hardwood can.

    Which lasts longer, hardwood or laminate flooring? Hardwood typically lasts far longer — 50 years or more with proper care and refinishing — compared to laminate’s typical 15-25 year lifespan before it needs full replacement.

    Is hardwood flooring worth the extra cost in India? For long-term homeowners with the budget for it, yes, particularly given the refinishing option and resale appeal. For shorter-term living situations or tighter budgets, laminate offers better value per rupee spent.

    Can laminate flooring get damaged by water? Yes, though it tolerates brief exposure slightly better than raw hardwood in some cases. Standing water or prolonged spills will still cause swelling and damage, so quick cleanup matters regardless of which you choose.

    Does hardwood flooring increase home resale value more than laminate? Generally yes, especially in premium property segments where buyers associate hardwood with quality. In more budget-conscious markets, the resale gap between well-installed laminate and hardwood tends to be smaller.

    Can I install hardwood or laminate flooring myself? Laminate is far more DIY-friendly thanks to click-lock installation systems designed for exactly that. Hardwood installation is more technical and generally best left to professionals, especially for solid wood planks that need proper acclimatization and nailing or gluing.


    Conclusion

    There’s no universally right answer in the hardwood vs laminate flooring debate — it genuinely comes down to your budget, how long you’re staying, and how much long-term durability matters to you versus upfront savings. Hardwood wins on longevity and resale appeal. Laminate wins on cost and low-maintenance convenience.

    Before you decide, measure out your actual space, get quotes for both options at your real square footage, and think honestly about how long you’re likely to stay in this home. That practical exercise usually makes the choice a lot clearer than staring at samples in a showroom ever will.

  • Best Flooring Options for High-Traffic Homes: Pros and Cons

    Best Flooring Options for High-Traffic Homes: Pros and Cons

    If you’ve got kids running around, a dog that doesn’t believe in walking calmly, or just a house full of people coming and going all day, you already know regular flooring doesn’t survive long. Finding the best flooring for high traffic areas isn’t about picking whatever looks nicest in the showroom — it’s about picking what’ll still look decent five years from now.

    I’ve made this mistake myself, actually. Went with a flooring choice based purely on how it looked in the sample tile, without thinking about how our living room gets used every single day. Big regret within eighteen months.

    This guide breaks down the flooring options that genuinely hold up under daily wear, along with the honest downsides of each — because every option has trade-offs, and nobody tells you that upfront at the showroom.

    What Makes Flooring “High-Traffic Ready” Anyway?

    Flooring suited for high-traffic areas needs to resist scratches, stains, and daily wear without showing damage quickly, while also being easy to clean and reasonably forgiving of spills, drops, and constant foot movement. Durability matters more than trend here.

    Before picking anything, it helps to know what you’re actually testing for. A flooring option might look gorgeous in a low-traffic guest room and fall apart within a year in a busy hallway or kitchen.

    The things that actually matter for high-traffic zones:

    • Scratch resistance — pets and dragged furniture are the real test here, not careful walking
    • Water and stain resistance, especially near entryways and kitchens
    • How it handles heavy daily cleaning, since high-traffic areas get mopped and swept far more often
    • Whether damage is repairable in patches, or whether one bad spot means redoing the whole floor

    Keep this checklist in mind as you go through the options below. What works beautifully in a bedroom might be a poor fit for your main hallway.

    Vitrified Tiles — The Reliable Default

    Vitrified tiles are, honestly, what most Indian homeowners land on for high-traffic areas, and there’s a good reason for that. They’re tough, water-resistant, and don’t really scratch under normal wear.

    Pros:

    • Extremely durable — genuinely one of the toughest options for daily wear and tear
    • Low maintenance; a simple wet mop keeps them looking fresh
    • Water-resistant, which makes them great for kitchens and entryways
    • Wide range of designs now, including ones that mimic wood or marble convincingly

    Cons:

    • Can feel cold underfoot, especially in winter, which some people don’t love
    • Grout lines between tiles collect dirt over time if not sealed properly
    • Poor installation shows badly — uneven tiles or bad grout work stand out immediately
    • Can be slippery when wet, which matters if you have elderly family members or young kids

    Cost-wise, decent vitrified tiles run anywhere from ₹40 to ₹120 per square foot depending on brand and finish, with installation adding another ₹15-₹25 per square foot. For a busy family home, this is usually the safest, most cost-effective pick.

    Laminate Flooring — Good Looks, Moderate Durability

    Laminate has come a long way from the flimsy stuff people associate it with. Modern laminate flooring can genuinely mimic wood convincingly, at a fraction of the cost.

    That said — and I’ll be honest here — I don’t think laminate is the best choice for the heaviest traffic zones in a home, like a main living room with kids and pets. It handles moderate use fine, but its weak spot is water. A spilled glass left unattended for too long can cause swelling at the seams, and once that happens, it’s not easily fixed.

    Pros:

    • Budget-friendly compared to real wood, typically ₹60-₹150 per square foot
    • Looks convincingly like wood or stone from a distance
    • Comfortable underfoot, warmer than tile
    • Quick to install, less mess than tile work

    Cons:

    • Not fully water-resistant — spills need to be wiped quickly
    • Scratches from pet claws or dragged furniture show more visibly than on tile
    • Can’t be sanded or refinished like real hardwood once it’s worn
    • Sound tends to be hollow underfoot, which some people find bothers them over time

    Laminate works best in moderate-traffic spaces — bedrooms, home offices, guest rooms — rather than the busiest zones of a high-traffic home.

    Engineered Wood — A Middle Ground Worth Considering

    Engineered wood sits between solid hardwood and laminate, and for high-traffic Indian homes, it’s an option that doesn’t get talked about enough.

    Unlike laminate, engineered wood has a real wood veneer on top, which means it can be sanded and refinished at least once or twice over its life — something laminate simply can’t do. It handles humidity better than solid hardwood too, which matters a lot in most Indian climates.

    Pros:

    • Real wood look and feel, more authentic than laminate
    • Better humidity resistance than solid hardwood
    • Can be refinished once or twice if it gets scratched over the years
    • More comfortable underfoot than tile, warmer in winter

    Cons:

    • Pricier than laminate, usually ₹150-₹350 per square foot
    • Still not fully waterproof — standing water is a genuine risk
    • Not as scratch-resistant as vitrified tile, so pet-heavy homes need to be a bit careful
    • Fewer local installers are properly trained on it compared to standard tile work, so finding good workmanship can take some searching

    If your budget allows and you want the warmth of wood without laminate’s limitations, this is worth a serious look for moderately-high traffic zones.

    Vinyl Flooring — Underrated for Busy Homes

    I think vinyl flooring is genuinely underrated in Indian homes, and I say that as someone who was skeptical of it myself for years. Modern vinyl — especially SPC (Stone Plastic Composite) and luxury vinyl planks — has gotten remarkably good.

    Vinyl flooring, particularly SPC variants, offers excellent water resistance, scratch resistance, and comfort underfoot, making it one of the more practical choices for high-traffic homes with kids or pets, without the cold feel of tile.

    Picture a household in Jaipur with two kids under ten and a golden retriever who treats the living room like an obstacle course. Vinyl handles that kind of daily chaos better than laminate would, and it’s noticeably warmer and quieter underfoot than tile — something that matters more than people expect once they’ve lived with it.

    Pros:

    • Fully waterproof in most SPC and rigid-core variants
    • Scratch and dent resistant, holds up well against pet claws
    • Soft and warm underfoot compared to tile
    • Easier and often cheaper installation than tile or wood

    Cons:

    • Quality varies hugely by brand — cheap vinyl looks and feels cheap, fast
    • Not as long-lasting as vitrified tile in extreme high-traffic commercial-style use
    • Can dent under heavy furniture if felt pads aren’t used
    • Some cheaper variants may off-gas a slight smell initially, though this fades

    Good SPC vinyl runs ₹80-₹180 per square foot including basic installation, making it competitively priced against mid-range laminate while outperforming it in durability.

    Natural Stone — Beautiful, But Not for Every High-Traffic Zone

    Marble, granite, and other natural stone flooring look stunning, no argument there. But for the busiest parts of a home, I’d actually push back against using natural stone unless you’re prepared for the maintenance that comes with it.

    [link to related guide on marble vs granite flooring maintenance here]

    Stone is porous, which means stains and etching happen more easily than most homeowners expect, especially from acidic spills like lemon juice or vinegar in a kitchen area. It also needs periodic sealing to maintain resistance.

    Pros:

    • Unmatched visual appeal and a sense of luxury
    • Genuinely durable structurally, lasts decades if maintained
    • Cool underfoot, which is a real advantage in hot Indian summers
    • Adds resale value in premium property segments

    Cons:

    1. Requires periodic sealing to stay stain-resistant, which is an ongoing cost
    2. Can be slippery, particularly polished finishes — a real concern with kids or elderly residents
    3. Expensive, often ₹150-₹500+ per square foot depending on the stone type
    4. Etching and staining from spills happen more easily than most people expect

    If you love the look, consider it for lower-traffic statement areas — a foyer, a formal living room — rather than the kitchen or main hallway that sees constant use.

    Comparing All Options at a Glance

    Flooring TypeDurabilityWater ResistanceComfort UnderfootApprox. Cost/sq ft
    Vitrified TilesExcellentExcellentLow₹40-₹120
    LaminateModeratePoor-ModerateHigh₹60-₹150
    Engineered WoodGoodModerateHigh₹150-₹350
    Vinyl (SPC)Very GoodExcellentHigh₹80-₹180
    Natural StoneExcellentModerateLow₹150-₹500+

    Numbers here are rough averages and vary by city and brand, but they should give you a fair sense of where each option sits relative to the others.

    How to Choose Based on Your Household

    There’s no single “best” answer here — it genuinely depends on who’s living in the house and how the space gets used.

    • Homes with young kids and pets: Vinyl (SPC) or vitrified tiles are your safest bets. Both handle spills, scratches, and heavy daily use without much drama.
    • Homes prioritizing comfort and looks over ultimate durability: Engineered wood strikes a nice balance, as long as you’re diligent about wiping up spills quickly.
    • Budget-conscious renovations: Vitrified tile remains the most cost-effective option that still performs well under heavy use.
    • Formal or lower-traffic spaces: Natural stone can shine here without the maintenance headache it’d cause in a busy kitchen.

    [link to related article on flooring installation costs in India here]

    Honestly, if you’re renovating a home with kids under ten, I’d lean toward vinyl or tile over anything else on this list, purely based on how many disasters I’ve seen unfold on laminate and wood floors over the years.


    Frequently Asked Questions

    What is the most durable flooring for high traffic areas? Vitrified tile is generally considered the most durable option for consistently heavy use, followed closely by SPC vinyl flooring, which offers similar toughness with better comfort underfoot.

    Is vinyl flooring good for homes with pets? Yes, especially SPC or rigid-core vinyl. It resists scratches from claws reasonably well and is fully waterproof, which handles accidents and spills much better than laminate or wood.

    Is laminate flooring a bad choice for high-traffic homes? Not bad exactly, but it’s better suited to moderate-traffic areas like bedrooms rather than the busiest zones of a home. Its main weakness is water sensitivity, which becomes a real issue in heavily used spaces.

    Which flooring is best for Indian kitchens specifically? Vitrified tile or SPC vinyl, both for their water resistance. Natural stone looks beautiful but needs sealing and careful maintenance to avoid staining from everyday cooking spills.

    How long does vitrified tile flooring typically last? With proper installation, vitrified tile can easily last 15-20 years or more under regular high-traffic use, making it one of the more cost-effective long-term choices available.

    Is engineered wood flooring worth the extra cost over laminate? If you want a more authentic wood feel and the option to refinish it later, yes. If budget is the primary concern and the space sees only moderate use, laminate is a perfectly reasonable choice too.


    Conclusion

    Picking the best flooring for high traffic areas really comes down to being honest about how your home actually gets used — not how you wish it got used. Vitrified tile and SPC vinyl tend to win out for the busiest zones, while laminate, engineered wood, and natural stone all have their place in lower-traffic or more controlled spaces.

    Before you commit to anything, walk through your home and map out which areas genuinely see heavy daily traffic versus which ones don’t. That one exercise will save you from the same regret I had — choosing flooring based on the showroom sample instead of how your family actually lives day to day.

  • Roof Maintenance Tips to Extend Its Lifespan by Years

    Roof Maintenance Tips to Extend Its Lifespan by Years

    Here’s something I’ve noticed after talking to enough homeowners about their roofs: the ones who never have problems aren’t lucky. They’re just consistent. They check their terrace twice a year, clear the drains before monsoon, and fix small cracks before they become big ones. That’s really the whole secret behind good roof maintenance tips — none of it is complicated, it’s just easy to forget until something leaks.

    Most people only think about their roof when water starts dripping onto the bedroom floor. By then, you’re not maintaining anymore, you’re repairing, and repairs cost a lot more than prevention ever does.

    This isn’t a list of expensive fixes. It’s the boring, practical stuff — the kind that, done consistently, can genuinely stretch a roof’s life by 10 years or more. Let’s get into it.

    Clean Your Drains and Gutters Before Every Monsoon

    Clogged drains are one of the leading causes of roof damage in Indian homes, since standing water during monsoon seeps into even small cracks and weakens the waterproofing layer over time. Clearing debris before the rains start is one of the simplest and most effective roof maintenance tips there is.

    Leaves, plastic bags, bird nests, dust — all of it collects in terrace drains over a dry summer, and nobody notices until the first heavy rain turns the terrace into a shallow pool. I genuinely think this is the single most underrated maintenance task on any homeowner’s list. It takes maybe 20 minutes and costs nothing.

    Do this before monsoon hits, ideally in May:

    • Walk the entire terrace and locate every drain outlet, not just the obvious one
    • Clear visible debris by hand, then flush each drain with a bucket of water to check flow
    • Check that water actually drains away and doesn’t pool anywhere on the surface
    • If you have a sloped roof, clear gutters and downspouts the same way

    Do it again midway through monsoon season if you’re in a heavy-rainfall city like Mumbai or Kolkata. One clearing in May usually isn’t enough to last through July and August.

    Inspect for Cracks Twice a Year

    Small cracks are cheap to fix. Big cracks are not. The entire logic behind regular inspection is catching the former before it becomes the latter.

    Pick two times a year for this — I’d suggest pre-monsoon (April-May) and post-monsoon (October). Walk your terrace slowly, and actually look, don’t just glance around while doing something else.

    What to check:

    1. Hairline cracks in the concrete surface, especially near drain outlets and parapet walls
    2. Gaps where the parapet wall meets the roof slab — this joint is notorious for developing leaks
    3. Any bubbling, flaking, or peeling in the existing waterproofing coat
    4. Areas where water seems to sit longer than the rest of the surface, even after rain has stopped

    Picture a small business owner in Jaipur running a shop out of the ground floor of her house, with a rented flat above. She does this two-minute terrace check every October, right after monsoon ends. Last year she caught a hairline crack near the parapet before it widened — a ₹2,000 fix instead of what could’ve been a ₹40,000 seepage repair a year later. That’s the whole point of consistent inspection.

    Reapply Waterproofing Coating Every 3-5 Years

    Waterproofing coatings degrade with UV exposure and rain over time, even when applied correctly, so reapplying every 3-5 years is one of the most important roof maintenance tips for preventing major leaks down the line. Waiting until visible damage appears usually means the layer has already failed in multiple spots.

    I’ll admit, this is the tip people skip most often, mostly because it feels expensive for something that “still looks fine.” But waterproofing coats break down invisibly before they break down visibly. UV rays, temperature swings, and standing water all wear away at the membrane long before you’d notice a leak.

    Signs your coating needs a refresh:

    • It’s been more than 4-5 years since the last application
    • The surface feels rough or chalky to the touch instead of smooth
    • Faded color compared to when it was freshly applied
    • Minor seepage that wasn’t there before, even without any visible cracking

    A fresh waterproofing coat for an average terrace typically runs ₹40-₹70 per square foot depending on the product used and your city. Compare that to a full waterproofing redo plus internal repair work after a leak actually happens, and reapplying on schedule is clearly the cheaper path.

    [link to related guide on choosing the right waterproofing material here]

    Trim Overhanging Trees and Remove Debris Regularly

    Trees look lovely near a home. They’re also, quietly, one of the more common causes of roof damage that people don’t connect the dots on.

    Overhanging branches drop leaves constantly, which clog drains, as we already covered. But they do more than that — branches that scrape against the roof surface during windy weather can wear down waterproofing coatings faster than sun exposure alone. And during a bad storm, weak branches can snap and cause real damage.

    A few things worth doing:

    • Trim branches back so nothing overhangs directly above the roof or terrace
    • Remove leaf litter regularly during autumn and pre-monsoon months, not just once a year
    • Check for any dead or weak-looking branches before storm season and get them removed professionally if they’re large

    This one’s easy to underestimate because the damage builds up slowly. Has this ever happened to you — noticing a thick layer of dried leaves on your terrace and thinking, “I’ll clear that later”? Later usually turns into monsoon, and by then the drains are already blocked.

    Check for Pooling Water After Every Rain

    Standing water is bad news for any roof, full stop. A well-designed roof should drain completely within a few hours of rain stopping. If it doesn’t, something’s off.

    Go up to your terrace an hour or two after a heavy rain and look for puddles that haven’t moved. Pooling usually points to one of two things: either the slope of the roof has settled unevenly over time, or a drain is blocked somewhere you haven’t checked.

    Persistent pooling in the same spot, rain after rain, is worth taking seriously. It means that patch of roof is absorbing far more water exposure than the rest of the surface, which speeds up wear dramatically. I’ve seen this exact issue turn a 20-year roof into one needing major repair by year 12, just because nobody addressed the pooling early on.

    If you notice consistent pooling, it’s worth calling a professional to check whether it’s a drainage fix or something more structural.

    Don’t Ignore Minor Leaks — Fix Them Immediately

    This might be the most obvious tip on this list, and yet it’s the one people follow the least. A small leak feels manageable. You put a bucket under it, mop up after rain, and move on with your week.

    But a leak doesn’t stay small. Water finds the path of least resistance, and once it’s inside your roof structure, it spreads sideways as much as it spreads down. A leak that starts in one corner of a room can, over a couple of monsoons, show up as a stain across the entire ceiling.

    Fixing minor leaks the moment they appear, rather than managing them with buckets and mops, prevents the surrounding waterproofing layer from failing entirely — a genuinely essential roof maintenance tip that saves both money and structural damage.

    My honest opinion here: I think a lot of people wait because getting someone out for “just a small leak” feels like overkill. It’s not. A same-week fix for a minor leak is a fraction of the cost of dealing with it after it’s spread across two rooms and started affecting the wiring.

    Maintain Proper Ventilation and Insulation

    Roof maintenance isn’t only about water. Heat and moisture buildup inside the roof structure matter too, especially in Indian summers where terrace temperatures can climb dramatically.

    Poor ventilation traps heat and humidity against the underside of the roof slab, which over years can weaken the structure and cause the paint and plaster below to deteriorate faster than it should.

    A few practical steps:

    • If you have a false ceiling, make sure there’s adequate ventilation space above it, not a sealed gap
    • Consider a reflective or cool roof coating if your top floor gets uncomfortably hot every summer — it also happens to protect the waterproofing layer from UV damage
    • Check that any roof vents or exhaust points aren’t blocked by debris or bird nests

    This tip gets less attention than leak prevention, but it genuinely extends the underlying structure’s life, not just the surface coating.

    Schedule a Professional Inspection Annually

    Doing your own checks twice a year is great, and honestly most homeowners could skip a professional visit if they’re diligent about it. But I’d still recommend one annual professional inspection, ideally right before monsoon.

    A trained eye catches things homeowners typically miss — early-stage structural issues, waterproofing that looks fine on the surface but has failed underneath, or drainage slopes that have shifted slightly without any obvious sign.

    [link to related article on what a professional roof inspection actually covers here]

    It usually costs somewhere between ₹1,000 and ₹3,000 depending on your city and roof size. Compare that to even one avoided seepage repair, and it more than pays for itself.


    Frequently Asked Questions

    How often should I do roof maintenance in India? A basic self-inspection twice a year — pre-monsoon and post-monsoon — covers most needs. Add an annual professional inspection and a waterproofing top-up every 3-5 years, and you’re covering nearly everything that causes premature roof failure.

    What’s the cheapest roof maintenance tip that makes the biggest difference? Clearing your drains before monsoon, without question. It costs nothing but time, and clogged drains are behind a huge share of the leak and seepage cases homeowners deal with every year.

    How long does waterproofing usually last on an Indian roof? Most quality waterproofing coatings last 3-5 years before needing reapplication, though this varies with the product used, sun exposure, and how much standing water the roof deals with each monsoon.

    Can I do roof maintenance myself, or do I need a professional every time? Basic checks — clearing drains, spotting cracks, checking for pooling — you can absolutely do yourself. Waterproofing application and any structural concerns are best left to a professional, since mistakes there get expensive fast.

    Does roof maintenance actually save money in the long run? Yes, significantly. Consistent maintenance in the range of a few thousand rupees a year almost always costs less than the alternative — one major seepage repair every few years, which can easily run into lakhs depending on the extent of damage.

    What’s the biggest mistake homeowners make with roof maintenance? Waiting until there’s a visible leak before doing anything. By that point, the waterproofing has usually already failed in more than one spot, which turns a simple maintenance task into a bigger repair job.


    Conclusion

    None of these roof maintenance tips are complicated or expensive on their own. Clear your drains, check for cracks twice a year, don’t let minor leaks sit, and reapply waterproofing on schedule instead of waiting for damage to show. It’s consistency that makes the real difference, not any single big fix.

    If it’s been a while since you’ve actually walked your terrace and looked closely, this weekend’s as good a time as any. Grab a torch, check the corners near the parapet, and clear whatever’s sitting in the drains. Small habit, big payoff over the years.