Blog

  • Signs You Need a New Roof (Don’t Ignore These Warnings)

    Signs You Need a New Roof (Don’t Ignore These Warnings)

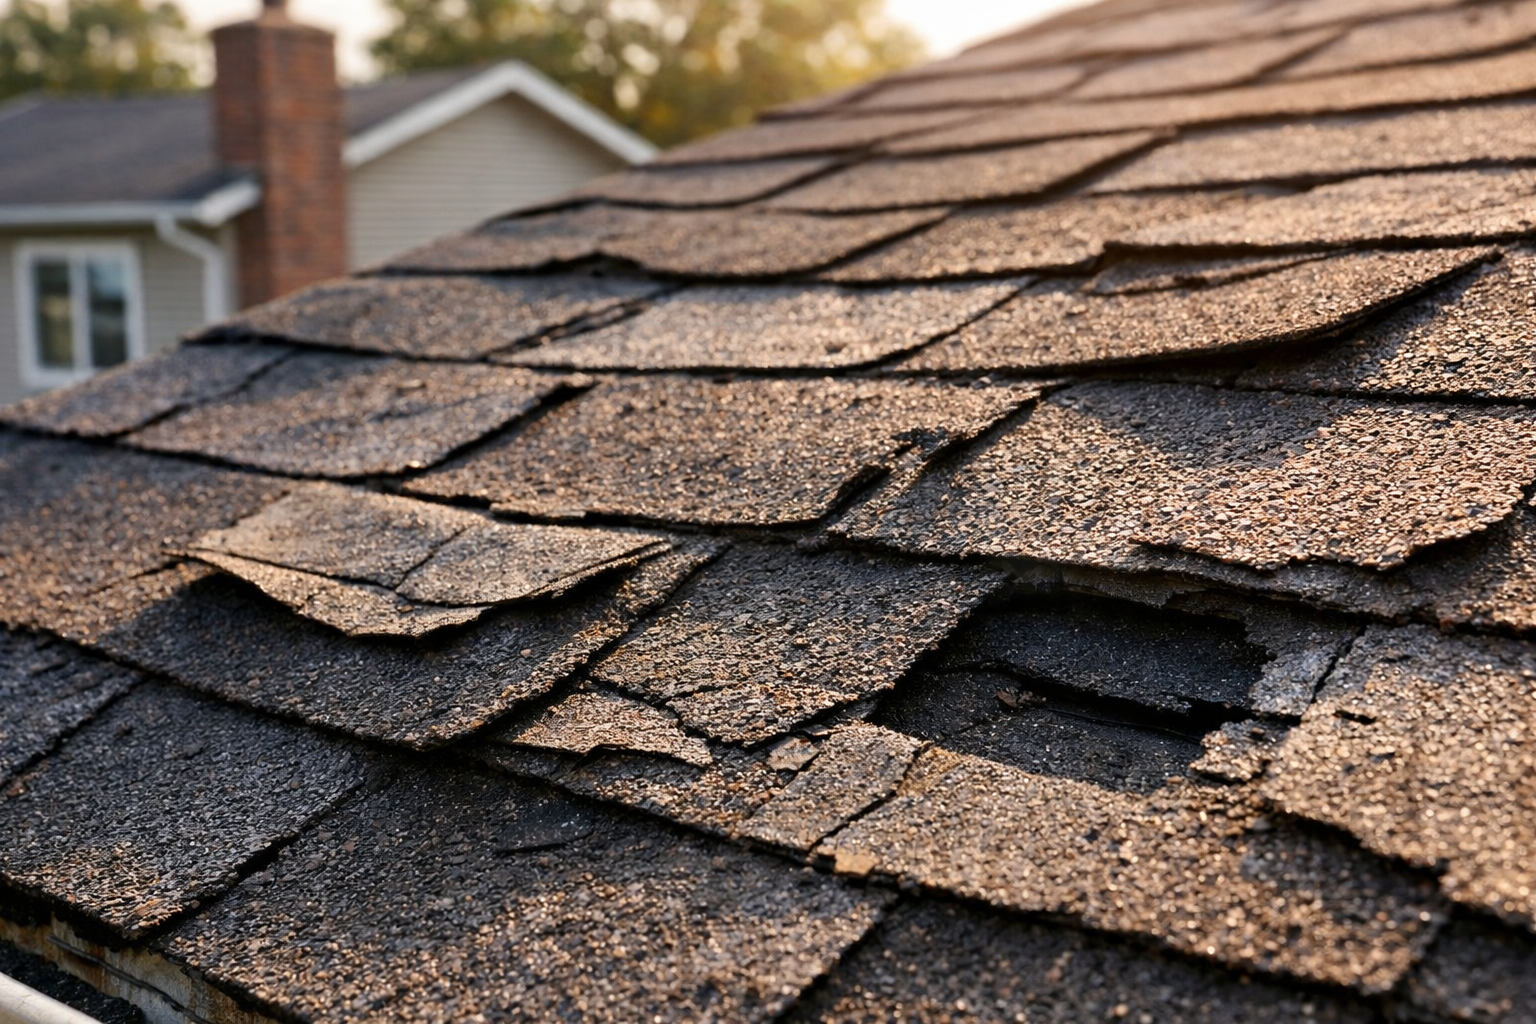
    Every monsoon, the same thing happens. A damp patch shows up on someone’s ceiling, they patch it up, and by next year it’s back — bigger this time. If that sounds familiar, you’re probably dealing with one of the classic signs you need a new roof, not just a one-off leak.

    The tricky part about roofs is that they fail slowly, then all at once. Nobody wakes up one day to a collapsed roof out of nowhere. There are warnings first — small ones, easy to explain away, easy to ignore. I’ve seen homeowners spend more on repeated patch jobs over three years than a proper replacement would’ve cost them upfront. It’s a frustrating pattern, and a common one.

    This guide walks through the real warning signs, what they actually mean, and when repair just isn’t going to cut it anymore.

    Water Stains and Ceiling Damage Keep Coming Back

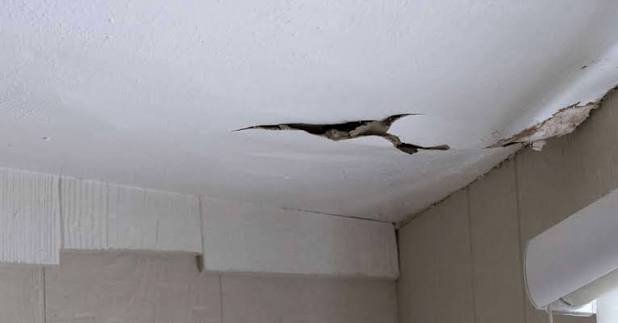
    Recurring water stains on your ceiling, especially ones that reappear after every monsoon despite repairs, are one of the clearest signs you need a new roof rather than another patch job. A single stain might just be a sealant issue. A pattern of stains means the underlying structure is compromised.

    Here’s the distinction that matters: a fresh stain after one heavy storm could genuinely be a minor, fixable problem. But if you’ve called a repair guy two or three times over the last couple of years for the same spot, that’s a different story. The waterproofing layer underneath has probably broken down in more places than you can see.

    I’ve noticed a lot of homeowners try to “wait it out” through one more monsoon season before committing to bigger repairs. Understandable — nobody wants to spend that kind of money if they don’t have to. But water damage doesn’t pause while you wait. It spreads into the concrete, weakens the rebar over time, and turns a ₹30,000 fix into a ₹2 lakh one.

    Watch for:

    • Brownish or yellowish rings on the ceiling, even if they look dry right now
    • Peeling paint directly below a stained patch
    • A musty smell in the room right after rain, even without visible dampness
    • Stains that show up in a new spot each season — this usually means the roof membrane has multiple failure points, not just one

    If you’re seeing more than one of these, it’s worth getting a proper roof inspection rather than another quick patch.

    Visible Cracks or Sagging in the Roof Slab

    A sagging roof isn’t subtle once you know what to look for, but plenty of people miss it because it happens gradually.

    Stand in your top-floor room and look at the ceiling from an angle, near a wall, with the light on. Does any part of it dip down slightly compared to the rest? That’s not your imagination. A sagging slab usually means water has been sitting in one spot for a long time, or the structural integrity has weakened.

    Cracks are a similar story. Small hairline cracks in a concrete roof are pretty normal and not always urgent. But wider cracks — anything you could slide a coin into — usually point to structural movement, and that’s one of the more serious signs you need a new roof or at least major structural repair work.

    A friend of mine in Jaipur ignored a sagging patch in her terrace room for almost two years, assuming it was just old paint work. Turned out water had been pooling above that exact spot every monsoon, slowly weakening the slab. By the time she got it checked, what could’ve been a straightforward waterproofing fix had turned into partial slab replacement. Expensive lesson.

    Your Roof Is Past Its Expected Lifespan

    Most RCC roofs in Indian homes last 25 to 30 years with proper maintenance, while roofs with older waterproofing methods or poor original construction may need attention as early as 15 years in. Age alone doesn’t mean immediate failure, but it’s a strong reason to get a professional inspection.

    If your home was built decades ago and the roof has never had a proper waterproofing redo, you’re likely overdue. This isn’t really about the concrete failing outright — it’s about the waterproofing layer on top, which typically needs redoing every 8-10 years even on a structurally sound roof.

    Ask yourself:

    • Was the roof waterproofed when the house was originally built, and never touched since?
    • Has it been more than a decade since any major roof work was done?
    • Are you noticing more repair calls in the last two years than the previous five combined?

    If you answered yes to most of these, age is likely playing a role, even if no single sign screams “emergency” yet.

    Increasing Repair Costs Every Year

    This one’s less about the roof itself and more about your wallet, but it’s honestly one of the most reliable signs you need a new roof.

    Track what you’ve spent on roof-related repairs over the last three years. Not just big fixes — the small stuff too. Sealant touch-ups, painter visits for damp patches, that one emergency waterproofing job before your daughter’s wedding because a stain showed up at the worst possible time.

    If that number is climbing every year rather than staying flat or dropping, your roof is telling you something. Repairs on a genuinely stable roof tend to plateau after the initial fix. Repairs on a failing roof multiply, because you’re treating symptoms, not the underlying cause.

    A rough guideline I’d suggest: if you’ve spent more than 30-40% of what a full waterproofing redo would cost, on patch repairs, within a three-year window, it’s time to have a serious conversation about doing it properly instead of piecemeal.

    [link to related guide on roof waterproofing costs in India here]

    Mold, Mildew, or a Persistent Musty Smell

    Not every roof problem announces itself visually. Sometimes it’s your nose that catches it first.

    A musty, damp smell in top-floor rooms — especially one that gets stronger during and right after rains — usually means moisture is getting trapped somewhere it shouldn’t be. This could be inside the roof slab itself, or in the insulation layer if your home has one.

    Mold growth is the visual version of the same problem. Look for:

    • Black or greenish spots along the edges of the ceiling, particularly corners
    • Discoloration around ceiling fixtures or light fittings
    • Any bubbling or blistering in the paint layer, which usually means moisture is trapped underneath

    Has this ever happened to you — walking into a room and immediately knowing something’s damp before you even see a stain? Trust that instinct. Mold isn’t just a cosmetic issue either; it can genuinely affect indoor air quality and isn’t great for anyone with respiratory sensitivities in the house.

    Daylight Visible Through the Roof (For Sloped or Tin Roofs)

    This one mostly applies to sloped roofs, tin sheet roofs, or older-style Mangalore tile roofs rather than flat RCC terraces, but it’s worth covering because it’s such an obvious yet often-missed sign.

    Go up to your attic or top floor during daylight hours, turn off the lights, and look up. Any pinpricks of light coming through? That’s a gap, and where light can get in, water absolutely will too.

    For tin or metal sheet roofs specifically, watch for:

    1. Rust spots, especially around screws and joints
    2. Sheets that have visibly shifted or lifted at the edges
    3. A hollow, loose sound when you tap the sheet, compared to a solid thud elsewhere

    Rusted or gapped metal sheets are usually cheaper to replace section by section rather than doing the whole roof, so this is one case where a partial fix genuinely makes sense — unlike RCC roofs, where problems tend to be more interconnected.

    Your Energy Bills Have Crept Up

    Not the first thing people think of when it comes to roofing, but it’s a real signal. A roof that’s lost its insulating properties — whether from water damage, aged waterproofing, or structural gaps — lets more heat in during summer.

    If your top-floor rooms feel noticeably hotter than they used to, and your electricity bills have gone up despite no major change in AC usage, your roof could be part of the problem. It’s not the only cause, obviously, but it’s worth ruling out, especially if the heat difference is concentrated on the top floor.

    A cool roof coating or proper insulation layer, added during a roof redo, can measurably bring down top-floor temperatures. I wouldn’t call it a primary reason to replace a roof on its own, but it’s a nice bonus reason when combined with the other signs on this list.

    When to Call a Professional vs. DIY Fix

    Not everything on this list means you need a full replacement. Genuinely, some of it is a Saturday afternoon fix with a tube of sealant.

    Call a professional roofer if you’re seeing structural signs — sagging, wide cracks, or repeated water damage in the same spot despite repairs. DIY sealant fixes are fine for minor, isolated issues but won’t solve an underlying structural or waterproofing failure.

    Rough guide:

    • Small hairline cracks, isolated minor seepage → DIY sealant, keep an eye on it
    • Recurring stains in the same spot, minor sagging → get a professional inspection, don’t DIY this
    • Wide cracks, visible sagging, mold spreading across multiple rooms → this needs a proper structural assessment, not a patch job

    [link to related article on choosing a reliable roofing contractor here]

    I’d rather a homeowner spend ₹1,500 on an inspection and find out it’s nothing serious than skip it and find out the hard way two monsoons later.


    Frequently Asked Questions

    How do I know if it’s a repair or a full roof replacement? If the damage is isolated to one small area and hasn’t recurred before, repair is usually enough. If you’ve repaired the same spot more than twice, or you’re seeing structural issues like sagging or wide cracks, replacement is the more sensible long-term option.

    How much does a roof replacement cost in India in 2026? It varies a lot by city and roof type, but for a standard RCC flat roof, waterproofing redo and structural repair combined can range from roughly ₹80-₹150 per square foot, depending on materials and the extent of damage.

    Can I just keep waterproofing the roof instead of replacing it? For roofs without structural damage, yes — waterproofing redo every 8-10 years is normal maintenance, not a sign of failure. It only becomes a problem when you’re doing it more frequently than that without addressing why it keeps failing.

    Is a sagging ceiling always a serious problem? Almost always, yes. Even a small dip usually means water has been sitting there for a while. It’s worth getting checked quickly rather than waiting, since it tends to get worse, not better.

    How long does a roof replacement usually take? For a standard home, a full waterproofing redo takes anywhere from 3 to 7 days depending on roof size and weather. Structural repairs involving slab work take considerably longer, sometimes a few weeks.

    Does roof age alone mean I need a replacement? Not necessarily. A well-maintained roof past 20 years can still be structurally fine. But age combined with any of the other warning signs on this list is a strong reason to get it inspected rather than assume it’s fine.


    Conclusion

    Roofs don’t fail overnight, they fail quietly, one ignored stain or hairline crack at a time. The signs you need a new roof are usually right there — recurring water stains, sagging patches, rising repair bills, that musty smell you’ve stopped noticing because you’ve gotten used to it. None of these are things to wait out.

    If even two or three of these signs feel familiar as you’ve been reading this, don’t wait for next year’s monsoon to make the decision for you. Get a proper inspection done now, while it’s still dry outside and you actually have the time to plan the work properly instead of scrambling during a leak.


  • How to Increase Your Home’s Resale Value Before Selling

    How to Increase Your Home’s Resale Value Before Selling

    So you’ve decided to sell. Maybe it’s a job relocation, maybe the kids have moved out and the house feels too big now, or maybe you just want to upgrade. Whatever the reason, one question is probably keeping you up at night: how do you increase home resale value without throwing lakhs of rupees at renovations that won’t pay off?

    I’ve watched friends and family go through this exact dilemma more than once, and honestly, the sellers who do well aren’t the ones who spend the most. They’re the ones who spend smart. A fresh coat of paint and a fixed leaky tap can do more for your sale price than a fancy modular kitchen nobody asked for. Let’s get into what actually works.

    Understand What Buyers Are Really Looking At

    Increasing home resale value starts with getting inside a buyer’s head, not your own. You love your home the way it is — that’s normal. But a buyer walking through your front door for the first time notices completely different things than you do.

    They notice smells. They notice cracks near the ceiling. They notice whether the bathroom tiles look tired or fresh. Buyers form an opinion within the first 90 seconds of walking in, according to several real estate agent surveys, and that first impression colors everything else they see afterward.

    Here’s the thing — buyers aren’t evaluating your home on an absolute scale. They’re comparing it, often unconsciously, to the last three or four properties they saw that week. If your flat feels dated next to a similarly priced one with newer fittings, you lose, even if your location is objectively better.

    Ask yourself honestly: if you walked into your own home as a stranger today, would it impress you? If the answer is “not really,” that’s your starting point.

    Fix the Small Stuff First — It Adds Up

    Right after inspecting your property, most sellers jump straight to big renovations. That’s usually a mistake. Small, unglamorous repairs give you the best return relative to what you spend, and they’re often what a buyer’s inspector flags first.

    Think about:

    • A dripping tap in the kitchen (cheap to fix, but it makes buyers wonder what else is neglected)
    • Squeaky doors and loose door handles
    • Cracked switchboards or exposed wiring — this one genuinely worries buyers, and rightly so
    • Patchy or peeling paint on walls, especially in the living room
    • Water stains on the ceiling, even old ones, because buyers assume they’re recent

    I once helped a relative go through this checklist before listing their 2BHK in Jaipur, and the difference in how the flat “showed” after two days of small fixes was honestly surprising. Nothing structural changed. It just stopped looking neglected.

    Budget somewhere between ₹15,000 to ₹40,000 for this kind of cleanup pass, depending on the size of the property. It’s one of the cheapest ways to increase your home’s resale value before you even list it.

    Repaint With Neutral Colors

    A fresh coat of neutral paint is one of the highest-ROI changes you can make — often recovering more than its cost at resale. Stick to whites, warm greys, or soft beiges so buyers can picture their own furniture in the space.

    That bold maroon accent wall you loved in 2019? It has to go. I’m not saying it looked bad — plenty of these choices look great when you’re living there. But buyers struggle to see past strong color choices. They start mentally calculating repainting costs instead of imagining their sofa in the living room.

    Neutral doesn’t mean boring, by the way. Warm off-whites, light greys, and soft sand tones photograph beautifully and make rooms feel bigger — which matters a lot for online listings where most buyers form their first impression these days.

    [link to related guide on choosing paint colors that sell homes faster here]

    A full-house repaint typically costs ₹25,000–₹60,000 depending on your city and the paint quality you go with. Compare that to what a dated, scuffed wall does to a buyer’s perception, and it’s not really a close call.

    Focus on the Kitchen — But Don’t Go Overboard

    Kitchens sell homes. Everyone in real estate agrees on this, and for good reason — it’s the room buyers scrutinize hardest, right after bathrooms.

    That said, I’d push back a little on the common advice to do a full modular kitchen overhaul before selling. Unless your kitchen is genuinely falling apart, a full renovation rarely recovers its cost at resale. You’re better off with targeted updates:

    1. Replace outdated cabinet handles and hinges (cheap, instant visual upgrade)
    2. Deep clean or re-laminate cabinet fronts instead of replacing them entirely
    3. Fix any chipped countertop edges
    4. Make sure the chimney and exhaust actually work — buyers test this
    5. Replace old, yellowed lighting with brighter LED fixtures

    A well-presented kitchen doesn’t need to be brand new. It needs to look cared for. That distinction matters more than people think.

    Don’t Ignore the Bathrooms

    Second only to kitchens, bathrooms carry huge weight in a buyer’s decision to increase or lower their offer. A grimy, outdated bathroom can undo the good impression created by an otherwise lovely home.

    You don’t need to retile everything. Focus on:

    • Regrouting tiles where grout has yellowed or cracked
    • Replacing an old, rusted showerhead or tap fixture
    • Fixing any silicone sealant around the bathtub or sink that’s gone moldy
    • Making sure exhaust fans actually work — musty bathrooms are an instant red flag

    Picture a young couple viewing a 3BHK in Malviya Nagar. The rest of the house is lovely, but the master bathroom has a cracked tile and a tap that leaks. That one detail sticks in their mind more than the beautiful balcony view did. It happens more often than sellers realize.

    Boost Curb Appeal — First Impressions Start Outside

    Before a buyer even steps through your door, they’ve already formed an opinion from the building entrance, the parking area, or your gate. This is the part sellers most often skip, and it’s a shame, because it’s usually inexpensive to fix.

    A quick checklist for improving curb appeal:

    • Clean or repaint the main door
    • Fix broken tiles or cracked flooring near the entrance
    • Trim overgrown plants, or add a couple of potted plants near the entrance if there’s space
    • Make sure the doorbell and main door lock work smoothly
    • Clean society common areas near your unit if you have any control over it (talk to your RWA if needed)

    Has this ever happened to you — walking into a building where the lobby smells damp or the lift creaks? It colors your expectations of the flat before you’ve even seen it. Buyers feel the same way.

    Upgrade Lighting and Fix Electrical Issues

    Lighting is one of those things people underestimate constantly. Dim, yellow, inconsistent lighting makes even a well-designed home feel gloomy and small in photos and in person.

    Swap old bulbs for warm-white LED lights throughout. It’s a small expense — usually under ₹5,000 for an entire flat — but it changes how every single room feels. Bright, evenly lit spaces photograph better for online listings too, and most buyers are scrolling through photos before they ever book a viewing.

    While you’re at it, get a local electrician to check for:

    • Loose switchboards
    • Any exposed or unsafe wiring
    • Non-functional points that a home inspector would flag

    This isn’t glamorous work. But it removes objections before a buyer even raises them, and that keeps negotiations shorter and smoother.

    Consider Strategic Renovations (When They Actually Pay Off)

    Not every upgrade is worth it, and I think this is where a lot of sellers waste money. Before spending on anything big, ask: will this increase resale value enough to justify the cost, or am I renovating for my own taste?

    Renovations that typically pay off:

    • Flooring upgrades — if your current flooring is old mosaic or badly worn, vitrified tiles or good laminate can genuinely lift perceived value
    • False ceiling in the living room — relatively cheap and makes spaces feel more “finished”
    • Modular wardrobes — buyers increasingly expect these, especially in mid-to-premium segments

    Renovations that usually don’t pay off:

    • Elaborate false ceilings with cove lighting everywhere
    • High-end designer furniture that isn’t included in the sale anyway
    • Swimming pools, home theaters, or anything hyper-personal to your taste

    A good rule of thumb: if the renovation is something a broad range of buyers would want, it’s probably worth it. If it’s something only you would love, save your money.

    Get a Pre-Listing Inspection

    Getting a professional inspection before listing helps you find and fix issues on your own terms, rather than having a buyer’s inspector discover them mid-negotiation — which almost always costs you more in the end.

    This step gets skipped constantly, and I genuinely don’t understand why. It costs a few thousand rupees and saves you from ugly surprises later — like a buyer’s inspector finding a seepage issue you didn’t know about, right when you’re two weeks from closing.

    An inspection typically covers plumbing, electrical systems, structural cracks, and seepage or dampness. Fixing these issues yourself, on your own timeline, is always cheaper and less stressful than fixing them under pressure during negotiation.

    [link to related article on preparing your home for a buyer inspection here]

    Stage the Home Before Photos and Viewings

    Staging sounds like a fancy Western real estate term, but it’s really just decluttering and arranging your home so it photographs and shows well. You don’t need a professional stager for a mid-range Indian home — though it certainly doesn’t hurt for premium properties.

    Simple staging tips:

    • Remove excess furniture so rooms feel bigger
    • Clear kitchen counters of clutter
    • Put away personal photos and religious items during viewings — buyers need to imagine themselves living there, not you
    • Open curtains and let natural light in for photos
    • Air out the house before every viewing

    I’ll be honest, this step feels unnecessary to a lot of sellers, and I get it — it’s your home, why should you have to stage it like a showroom? But it works. Homes that are staged well consistently sell faster and closer to asking price, even when nothing structural has changed.


    Frequently Asked Questions

    Does painting really increase resale value, or is that overrated? It genuinely helps, and it’s one of the cheapest fixes on this list. A fresh, neutral paint job removes the “lived-in and dated” feeling instantly, and it’s usually one of the first things buyers notice when they walk in.

    How much should I spend before selling my home in India? There’s no fixed number, but a reasonable range for small repairs, painting, and touch-ups is ₹50,000 to ₹1.5 lakh for a mid-sized flat. Big renovations should only happen if there’s a genuine structural need.

    Is it worth renovating the kitchen fully before selling? Usually not, unless it’s in really poor condition. Targeted fixes — new handles, working chimney, clean countertops — give a better return than a full modular overhaul in most cases.

    Should I fix everything an inspector might flag, or just the big issues? Fix the big issues for sure — seepage, electrical safety, structural cracks. Smaller cosmetic issues are worth fixing too if your budget allows, since they influence buyer perception even if they’re not deal-breakers.

    Does the current year matter for home resale trends? Yes, actually. Buyer expectations shift — in 2026, things like modular storage, good lighting, and move-in-ready condition matter more than they did even five years back, especially with younger buyers comparing listings online first.

    Will staging really make a difference if my home’s location is already good? A good location gets buyers through the door. Staging is what convinces them to make an offer once they’re inside. Both matter, just at different stages of the sale.


    Conclusion

    At the end of the day, increasing your home’s resale value isn’t about spending the most money — it’s about spending it on the right things. Fix the small stuff, repaint with neutral tones, sort out the kitchen and bathrooms, and don’t skip curb appeal or a pre-listing inspection. These are the changes buyers actually notice and pay for.

    Start with a walk-through of your own home this weekend, room by room, and make a list of what genuinely bothers you. Chances are, it’ll bother a buyer too. Fix those first, and you’ll likely see the difference in how quickly — and how well — your home sells.

  • First Time Home Buyer Guide: Everything You Need to Know

    First Time Home Buyer Guide: Everything You Need to Know

    Buying your first home is exciting. It’s also a little terrifying, if we’re being honest. This first time home buyer guide exists because most people go into their first property purchase knowing far less than they think they do — and the mistakes made in month one can follow you for the next twenty years of EMIs.

    I remember sitting across from a builder’s sales rep years ago, nodding along to terms I didn’t fully understand, just because I didn’t want to look clueless. Bad idea. Nobody hands you a manual for this stuff, so most of what you learn comes from other people’s expensive mistakes — or your own.

    This guide walks through the real steps: budgeting honestly, understanding loans, checking legal paperwork, and knowing what actually matters versus what’s just sales pitch noise. Let’s get into it.

    Figure Out What You Can Actually Afford

    Direct answer: As a rough rule, your total EMI (including the home loan) shouldn’t exceed 40% of your monthly take-home income. Factor in a down payment of 10-20% of the property value, plus 5-8% extra for registration, stamp duty, and other charges.

    This is where most first-time buyers get it wrong — they start with “how much loan can I get approved for” instead of “what can I comfortably pay every month without stress.” Banks will often approve more than you should actually take. Just because you can borrow ₹80 lakh doesn’t mean you should.

    A few numbers worth sitting with before you even start browsing listings:

    • Down payment: usually 10-20% of the property price, paid upfront
    • Stamp duty and registration: typically 5-8% of property value, varying by state
    • Home loan processing fees: often 0.5-1% of the loan amount
    • Ongoing costs: maintenance charges, property tax, home insurance

    I’ve noticed people budget for the down payment and completely forget about the “hidden” 5-8% in stamp duty and registration. That’s a real number, not a footnote — on a ₹60 lakh flat, that’s potentially ₹3-4 lakh you need ready separately from your down payment.

    Build in a buffer too. Something always comes up — a legal fee you didn’t expect, or interior work that costs more than the quote. Give yourself at least 10% extra cushion beyond your calculated budget.

    Get Your Credit Score in Order First

    Before you even start house-hunting, check your CIBIL score. Anything above 750 generally gets you better loan terms — lower interest rates, faster approval, less back-and-forth with the bank.

    If your score’s lower than that, it’s worth pausing your search for a few months to fix it rather than rushing in. Pay off outstanding credit card dues, avoid taking new loans right before applying, and check your credit report for errors (they happen more often than you’d think).

    A friend of mine in Bengaluru had a mysterious ₹15,000 default showing on his report from a card he’d closed years earlier. Took him six weeks to sort out, but it bumped his score up enough to shave almost half a percent off his home loan interest rate. Over a 20-year loan, that adds up to real money.

    Understand Your Home Loan Options

    Direct answer: Most first-time buyers choose between fixed-rate and floating-rate home loans. Floating rates, tied to the RBI’s repo rate, are more common in India and currently offer more flexibility, while fixed rates give payment certainty but usually come at a slightly higher initial rate.

    Shopping around actually matters here. Don’t just go with whichever bank your salary account is with — compare at least 3-4 lenders. Even a 0.25% difference in interest rate makes a noticeable dent over a 15-20 year loan tenure.

    Things worth comparing beyond just the interest rate:

    1. Processing fees and prepayment charges — some banks waive these, some don’t
    2. Loan tenure flexibility
    3. How quickly they process approvals (some take 2 weeks, others drag on for two months)
    4. Whether they offer a top-up loan facility later, for renovations or emergencies

    Also look into government schemes if you qualify — depending on income category and property value, there can be meaningful subsidy benefits that lower your effective loan cost. Worth checking with your bank or a loan advisor before finalizing anything. [link to related guide on comparing home loan interest rates here]

    Don’t Skip the Legal Due Diligence

    This is the section people rush through, and it’s the one that bites hardest later if you get it wrong. A first time home buyer guide isn’t complete without hammering this point home: get a lawyer to check the property’s title before you sign anything.

    Key documents to verify:

    • Title deed — confirms the seller actually owns the property free and clear
    • Encumbrance certificate — shows there’s no pending loan or legal dispute on the property
    • Occupancy certificate (for ready-to-move properties) — confirms the building is legally fit for occupation
    • RERA registration — mandatory for most under-construction projects in India, and worth checking on the state RERA website directly

    Has this ever happened to someone you know — buying a flat, only to discover years later there’s a dispute over the land title? It happens more than people realize, especially with older properties or family-owned land that hasn’t been through a clean transfer.

    Spending ₹15,000-25,000 on a good property lawyer to verify documents is nothing compared to the potential loss of buying something with a legal cloud over it. This step isn’t optional, no matter how much the builder or agent pushes you to skip it and “trust the process.”

    Under-Construction vs Ready-to-Move: Pick Wisely

    Both have real trade-offs, and neither is automatically the better choice — it depends on your situation.

    Under-construction properties are usually 10-15% cheaper and come with more customization options, but you’re taking on risk. Delays happen constantly in Indian real estate, sometimes stretching a “2 year” project into 4 or 5 years. You’ll also be paying rent and EMI simultaneously during that gap, which strains most budgets.

    Ready-to-move properties cost more upfront but remove that uncertainty entirely. What you see is what you get, and you can move in as soon as the paperwork clears.

    Picture a young couple in Jaipur, both working, planning a wedding next year. They chose ready-to-move specifically because they couldn’t handle the double burden of rent plus EMI on an under-construction flat that might get delayed. That decision, in hindsight, was probably the right call for their situation — even though it meant a slightly higher budget.

    If you do go under-construction, only consider RERA-registered projects from builders with a track record of delivering on time. Check their previous project completion history before committing.

    Factor in Location Beyond Just the Price Tag

    Direct answer: Location affects far more than resale value — it determines your daily commute time, access to schools and hospitals, future infrastructure growth, and how easily the property will rent out or sell later. Cheaper properties in poorly connected areas often cost more in the long run through commute time and lower appreciation.

    It’s tempting to chase the lowest price per square foot, especially in your first purchase. But a flat that’s 20% cheaper on the outskirts, with a 90-minute commute each way, has a real cost — just one that doesn’t show up on the sale agreement.

    Things worth researching before finalizing an area:

    • Planned metro or highway connectivity in the next 3-5 years
    • Distance to your workplace, on an actual weekday, not a Sunday test drive
    • Nearby schools and hospitals, even if you don’t need them yet
    • Water supply reliability — this is a bigger issue in some Indian cities than people expect

    Visit the neighborhood at different times — morning, evening, and ideally a weekend too. A locality can feel completely different depending on when you see it.

    Don’t Forget the Extra Costs After Possession

    A lot of first time home buyer budgets stop at the purchase price and loan. Big mistake. There’s a real chunk of spending that hits right after you get the keys.

    Typical post-possession costs:

    • Interior and furnishing — even a modest setup runs ₹3-8 lakh depending on the flat size and finish level
    • Society maintenance deposits, often a lump sum charged upfront by the builder or association
    • Home insurance — inexpensive, but skipped by more people than it should be
    • Moving costs, utility connections, and the general chaos of settling in

    Set aside a separate fund for this before possession day arrives. Trying to figure out furnishing costs while also managing EMI payments and a security deposit refund from your old rental is a stressful combination — trust me, or trust the dozens of people who’ve told me the exact same thing.


    Frequently Asked Questions

    How much down payment do I need for my first home in India? Most lenders require 10-20% of the property value as a down payment, with banks financing the remaining 80-90% through a home loan. Higher-value properties sometimes require a slightly larger down payment percentage.

    What credit score do I need for a home loan? A CIBIL score above 750 generally gets you the best interest rates and smoother approval. Scores between 650-750 can still get approved, but usually at a higher interest rate.

    Is it better to buy an under-construction or ready-to-move property? It depends on your risk tolerance and timeline. Under-construction is cheaper but carries delay risk, while ready-to-move costs more but removes that uncertainty entirely.

    What documents should I check before buying a property? At minimum, verify the title deed, encumbrance certificate, occupancy certificate (for ready properties), and RERA registration (for under-construction projects). A property lawyer should review all of these.

    How long does the home loan approval process take? It varies by bank, but typically 1-3 weeks once you’ve submitted all required documents. Delays usually happen due to incomplete paperwork or property document issues, not the bank itself.

    What are the hidden costs of buying a home that people forget? Stamp duty and registration (5-8% of property value), maintenance deposits, interior costs, and home insurance are the most commonly overlooked expenses beyond the purchase price and loan.

    Conclusion

    Buying your first home doesn’t have to feel like walking into a fog. Get your finances honestly assessed, your credit score sorted, your legal documents verified, and your location researched properly — and most of the anxiety around this process fades away.

    This first time home buyer guide covers the essentials, but every property and every city has its own quirks worth digging into further. Take your time, ask uncomfortable questions to your builder or agent, and don’t let anyone rush you into signing something you haven’t fully understood. This is one decision worth getting right the first time.

    Note: This guide is meant for general informational purposes. For advice specific to your financial situation or a particular property transaction, it’s worth consulting a qualified financial advisor or property lawyer.

  • How to Start a Small Space Vegetable Garden

    How to Start a Small Space Vegetable Garden

    You don’t need a farm, or even a proper backyard, to grow your own vegetables. A small space vegetable garden can live on a third-floor balcony, a narrow windowsill, or a concrete terrace in the middle of a city — and honestly, some of the best harvests I’ve seen came from spaces smaller than a parking spot.

    If you’ve been putting off growing your own tomatoes or coriander because you think you need a big plot of land, that’s the myth we need to bust first. Space isn’t really the limiting factor. Planning is.

    I started with four pots on a Delhi balcony that got maybe five hours of direct sun a day. Within two months, I had more chillies and coriander than I knew what to do with. Not everything worked — my first attempt at growing carrots in shallow containers was a disaster — but the failures taught me more than the wins did.

    Pick the Right Spot Before Buying Anything

    Direct answer: Before starting a small space vegetable garden, observe your available area for at least a day to track sunlight hours. Most vegetables need 5-6 hours of direct sun daily, so choose the sunniest corner of your balcony, terrace, or windowsill first.

    This step gets skipped constantly, and it’s the reason so many beginner gardens fail in the first month. People buy pots and seeds first, then figure out placement later. Backwards approach.

    Spend a day just watching your space. Where does the sun actually hit, and for how long? South or west-facing balconies in most Indian cities get decent light. North-facing ones are trickier — you’ll want to lean toward leafy greens that tolerate some shade rather than fruiting vegetables like tomatoes.

    A few things worth checking:

    • How many hours of direct, unobstructed sunlight does the spot get
    • Whether wind is an issue (high-rise balconies can get surprisingly gusty)
    • Access to a water source nearby — carrying water buckets gets old fast

    Terraces generally offer more flexibility since you’ve got floor space to work with, not just railings. If you’re working with a windowsill only, herbs and microgreens are realistically your best bet — they don’t need much room to produce something usable.

    Choose Containers That Actually Work

    Not every pot is created equal, and this trips up a lot of first-timers. Depth matters more than most people realize.

    Shallow, wide pots look nice but starve root vegetables like carrots and radishes of the depth they need. Go for at least 8-10 inches of depth for most vegetables, and 12+ inches for anything with a deeper root system, like brinjal or okra.

    Good container options for a small space vegetable garden:

    1. Grow bags — cheap, widely available, and surprisingly effective (₹40-100 each depending on size)
    2. Plastic buckets with drainage holes drilled in — free if you’re repurposing old ones
    3. Terracotta pots — great drainage but dry out fast in Indian summers, so plan to water more often
    4. Vertical planters or hanging pots — genuinely useful if floor space is your bottleneck

    Drainage holes are non-negotiable. Waterlogged roots rot, full stop. If your pot doesn’t have them, drill some or don’t use it.

    Vertical Gardening Makes a Real Difference

    Direct answer: Vertical gardening uses wall space, railings, and stacked planters instead of floor area, letting a small space vegetable garden grow 2-3 times more produce in the same footprint by training climbing vegetables upward.

    Climbers like beans, peas, cucumbers, and even small gourd varieties can be trained up a trellis, netting, or simple bamboo poles tied together. Instead of sprawling across your floor, they grow up instead — and honestly, they look great doing it.

    A cheap trellis costs next to nothing to set up. Some jute rope and a couple of bamboo sticks will do the job. Attach it to a railing or wall, and let the plant do the climbing.

    I’ll admit vertical setups take a bit more monitoring at first — you’re gently guiding vines in the right direction for the first couple of weeks. After that, they mostly take care of themselves.

    Start With Vegetables That Forgive Mistakes

    Nobody nails it on their first try. Pick forgiving vegetables and you’ll stay motivated instead of giving up after week two.

    Easiest options for beginners:

    • Coriander and mint — genuinely hard to kill, and you’ll use them constantly in Indian cooking
    • Green chillies — one plant can keep producing for months
    • Spinach and fenugreek (methi) — quick to harvest, usually ready in 25-30 days
    • Cherry tomatoes — more forgiving than full-size tomatoes and great in containers

    Skip these until you’ve got more confidence: cauliflower, full-size cabbage, and root vegetables like potatoes. They need more space and more precise conditions than a balcony setup usually provides.

    Picture a working parent in Pune with maybe twenty minutes a day to spare. Coriander, mint, and a chilli plant are realistic. A full cauliflower patch is not. Match your vegetable choices to your actual bandwidth, not your ambition.

    Soil and Compost Matter More Than People Think

    Direct answer: Container vegetables need a lighter, richer soil mix than garden beds — typically a combination of garden soil, compost, and coco peat in roughly equal parts — because containers can’t replenish nutrients naturally the way open ground does.

    Regular garden soil packed into a pot tends to compact and drain poorly. Not ideal. A mix of one part garden soil, one part compost, and one part coco peat gives roots room to breathe and holds moisture without waterlogging.

    Homemade compost works beautifully here, and it’s basically free once you get into the habit. Kitchen scraps — vegetable peels, eggshells, tea leaves — break down into genuinely good compost within 6-8 weeks if you’re turning it occasionally.

    Don’t have space for a compost bin? A simple bokashi bucket or a small terracotta composter works fine on even a tiny balcony. [link to related guide on composting in small spaces here]

    Refresh the top layer of soil every season, and mix in fresh compost every couple of months. Container soil depletes faster than you’d expect since there’s no surrounding earth to replenish it naturally.

    Watering Without Overdoing It

    This is where most beginners go wrong — not underwatering, but overwatering. Container plants are more sensitive to it since there’s nowhere for excess water to go except through the drainage hole.

    Stick your finger an inch into the soil before watering. Dry? Water it. Still damp? Leave it another day. Simple test, but it works better than any fixed schedule.

    In peak Indian summer, most container vegetables need watering once a day, sometimes twice if it’s brutally hot. In cooler months, every 2-3 days is usually plenty. A small space vegetable garden in containers dries out faster than an in-ground bed, so don’t assume the same schedule applies.

    Self-watering pots or a basic drip line (covered in more detail in [link to related guide on drip irrigation here]) take a lot of the guesswork out if you travel often or just forget sometimes. No shame in that — I forget too, more often than I’d like to admit.

    Deal With Pests the Simple Way

    Balcony and terrace gardens generally face fewer pest issues than ground-level gardens, but it’s not zero. Aphids and mealybugs show up occasionally, especially on chilli and tomato plants.

    Neem oil spray, diluted with water, handles most common pests without needing anything harsh. Mix about 5ml neem oil per litre of water, spray every 7-10 days if you spot an issue, and that usually clears it up within two to three weeks.

    A few low-effort prevention habits:

    • Wipe leaves down occasionally to knock off dust and early pest colonies
    • Don’t overcrowd pots — poor air circulation invites problems
    • Remove yellowing or dead leaves promptly instead of letting them sit

    Companion planting helps too. Marigolds planted near vegetable pots genuinely do repel certain pests, and they add a nice splash of color while they’re at it.

    Harvest Smart to Keep Plants Producing

    Here’s something a lot of guides skip: how and when you harvest actually affects how much your plant keeps producing.

    For leafy greens like spinach and coriander, harvest outer leaves first and let the center keep growing — this stretches a single plant’s yield over weeks instead of one big cut. For chillies and tomatoes, regular picking (rather than letting fruit sit and over-ripen) actually signals the plant to keep producing more.

    Has your basil ever gone leggy and stopped producing new leaves? That’s usually from not pinching it back regularly. A little trimming keeps most herbs bushier and more productive long-term.


    Frequently Asked Questions

    How much sunlight does a small space vegetable garden need? Most fruiting vegetables like tomatoes and chillies need 5-6 hours of direct sun daily. Leafy greens and herbs can get by with a bit less, around 3-4 hours, which makes them a good fit for partially shaded balconies.

    What vegetables grow best in small containers? Coriander, mint, spinach, fenugreek, green chillies, and cherry tomatoes are the easiest for beginners. They don’t need deep root space and tend to forgive minor watering mistakes.

    Can I grow vegetables on a north-facing balcony? It’s tougher, but not impossible. Lean toward leafy greens and herbs rather than fruiting vegetables, since they tolerate lower light levels better.

    How often should I water container vegetables? Check the soil with your finger before watering rather than following a fixed schedule. Generally, once daily in summer and every 2-3 days in cooler months works for most containers.

    Is composting necessary for a balcony vegetable garden? Not strictly necessary, but it makes a real difference. Container soil loses nutrients faster than ground soil, so adding compost every couple of months keeps plants healthier and more productive.

    How long does it take to see results from a small space vegetable garden? Quick-growing options like spinach and coriander are usually ready to harvest in 25-30 days. Chillies and tomatoes take longer, typically 60-90 days before your first real harvest.

    Conclusion

    Starting a small space vegetable garden really comes down to a handful of decisions done right — good sunlight, decent containers, sensible soil, and vegetables that match your actual time and effort. You don’t need acres of land, just a corner that gets enough light and a bit of patience while things get going.

    Start small. Pick two or three forgiving vegetables, get your containers sorted, and build from there once you see what actually works in your space. That first homegrown coriander sprig on your plate tastes better than you’d expect — go find out for yourself.

  • Low-Maintenance Garden Ideas for Busy Homeowners

    Low-Maintenance Garden Ideas for Busy Homeowners

    Between work calls, school runs, and the general chaos of daily life, who has three hours every Sunday to fuss over a garden? Not most of us. If you’ve ever stood at your back door looking at overgrown beds and just sighed, this one’s for you. The good news is that low maintenance garden ideas aren’t some rare secret — they’re mostly about picking the right plants and setting things up smart from day one, so the garden works for you instead of the other way around.

    I’ve killed my fair share of plants trying to keep up a garden that honestly needed a full-time gardener. What finally worked was scaling back, choosing tougher plants, and letting go of the idea that every inch of soil needs to be “doing something.” Here’s what I’ve learned, plus a few ideas that genuinely hold up even when life gets busy.

    Why Low Maintenance Doesn’t Mean Boring

    Low maintenance garden ideas get a bad reputation — people assume it means gravel and a couple of sad cacti. That’s just not true anymore. A well-planned low-effort garden can be lush, colorful, and full of texture. The trick is in the planning stage, not in giving up on beauty.

    Think of it this way: a high-maintenance garden is like owning a sports car — gorgeous, but it demands constant attention or it stops running well. A low-maintenance one is more like a good SUV. Reliable, still looks great, doesn’t need you hovering over it every weekend.

    I redesigned a friend’s front yard in Jaipur two summers ago — she travels for work almost every month and kept coming home to dead plants. We swapped her thirsty annuals for native succulents, a couple of frangipani trees, and a gravel path. Eighteen months later, it still looks good, and she waters it maybe once every ten days in peak summer.

    A few things that instantly cut down on garden work:

    • Grouping plants by water needs (so you’re not overwatering some and underwatering others)
    • Mulching beds to slow down weed growth
    • Choosing perennials over annuals — you plant once, not every season

    None of this is complicated. It just needs a little upfront thought.

    Choose Native and Drought-Tolerant Plants

    Direct answer: Native and drought-tolerant plants need less water, less fertilizer, and less babying because they’re already adapted to your local climate and soil. For most Indian regions, that means options like bougainvillea, aloe vera, lantana, and hibiscus.

    This is honestly the single biggest lever you can pull. Non-native plants are basically high-maintenance by default — they weren’t built for your soil, your rainfall pattern, or your summer heat, so they need constant help to survive.

    In hot, dry states like Rajasthan or Gujarat, go for:

    • Bougainvillea (blooms for months, barely needs watering once established)
    • Aloe vera and other succulents
    • Vinca (periwinkle) — flowers almost year-round with minimal fuss
    • Neem or gulmohar trees for shade, if you have the space

    In cooler or wetter regions, marigold, hibiscus, and money plant do a lot of the heavy lifting without asking much in return. I’ll be honest — I used to plant whatever looked pretty at the nursery, without checking if it even belonged in this climate. Massive mistake. Half of them didn’t survive one full summer.

    Install a Simple Drip Irrigation System

    Direct answer: A basic drip irrigation setup delivers water directly to plant roots on a timer, cutting watering time to almost zero while actually using less water than a hose or watering can. Setup costs for a small home garden typically run between ₹3,000 and ₹8,000.

    I resisted this for years, thinking it was overkill for a small home garden. Wrong call. Once I got a basic drip system installed, my morning “water the plants” chore just… disappeared. It runs on a timer before sunrise, and I don’t even think about it anymore.

    You don’t need anything fancy. A simple kit from a local nursery or online (Amazon India has decent options) includes tubing, drippers, and a timer. Most homeowners can set it up in an afternoon — no plumber required.

    Benefits worth mentioning:

    • Reduces water wastage by up to 30-50% compared to manual watering
    • Prevents overwatering, which is one of the top reasons plants die
    • Works even when you’re traveling, so nothing shrivels up while you’re away

    If you’re renting or unsure about a permanent setup, there are battery-operated timer taps that clip onto any outdoor faucet. Less efficient, but still a huge time-saver.

    Go Heavy on Mulch

    Mulch is one of those things gardeners talk about constantly, and for good reason — it genuinely does most of the boring work for you. A 2-3 inch layer of organic mulch (dried leaves, straw, wood chips, or coco peat) around your plants blocks sunlight from reaching weed seeds, so fewer weeds sprout in the first place.

    It also locks moisture into the soil, meaning you water less often. And as it breaks down, it feeds the soil naturally — free fertilizer, basically.

    Some easy mulch options available in most Indian cities:

    • Coco peat (cheap, widely available, great water retention)
    • Dried grass clippings or leaves — free if you have a lawn already
    • Wood chips or bark, better for a more polished look near pathways

    Reapply every few months as it breaks down. That’s really the only “maintenance” involved.

    Build Raised Beds or Container Gardens

    Direct answer: Raised beds and containers give you full control over soil quality, drainage, and weed exposure, which means significantly less digging, weeding, and pest management than a traditional in-ground garden bed.

    If your existing soil is poor — clay-heavy, rocky, or just exhausted — fighting it every season is exhausting. Raised beds sidestep that problem completely. You fill them with good soil once, and you’re set for years.

    Containers work even better for apartment balconies or small courtyards, which describes a huge number of homes in cities like Mumbai, Bengaluru, and Delhi. Pick self-watering pots if you can — they hold a small water reservoir at the base so plants don’t dry out as fast.

    A few practical tips:

    1. Use a mix of potting soil, compost, and coco peat for good drainage
    2. Group containers by sun exposure — don’t scatter shade lovers into full sun
    3. Terracotta pots look lovely but dry out faster than plastic or ceramic ones

    Honestly, I prefer containers over in-ground beds now. Easier to rearrange, easier to fix if something’s not working, and no back-breaking digging involved.

    Skip the Lawn, or Shrink It

    Lawns are gorgeous. They’re also relentless — mowing, edging, fertilizing, dealing with patchy brown spots. If a lush green lawn isn’t something you genuinely enjoy maintaining, it might be time to rethink it.

    Ground covers like dichondra or creeping thyme need far less mowing (sometimes none at all) and still give you that green, soft look underfoot. Gravel or paved patios with pockets of planting are another solid option — especially popular in newer Indian homes with smaller plots.

    You don’t have to go all-or-nothing either. Shrinking your lawn by even 40-50% and replacing the rest with mulch beds, gravel paths, or ground cover cuts your weekly maintenance time dramatically. Has your lawn ever felt like a second job? For a lot of people, it genuinely is one.

    Pick Perennials Over Annuals

    Direct answer: Perennial plants live for multiple years and regrow each season on their own, while annuals need to be replanted every year — making perennials a far lower-effort choice for anyone who wants color without repeat planting work.

    Annuals like petunias and pansies are beautiful, no argument there. But you’re essentially starting from scratch every single season. That’s a lot of digging, buying, and planting for flowers that last a few months.

    Perennials worth considering for Indian gardens:

    • Hibiscus (blooms for years, tolerant of heat)
    • Plumbago — soft blue flowers, very low fuss
    • Curry leaf plant — useful and practically indestructible
    • Money plant — near impossible to kill, even indoors

    Mixing in a handful of perennial shrubs as your garden’s backbone, then adding a few annuals just for seasonal pops of color, gives you the best of both without the constant replanting cycle. [link to related guide about seasonal Indian garden plants here]

    Automate What You Can

    Direct answer: Smart timers for irrigation, solar-powered garden lights, and app-controlled watering systems handle routine garden tasks automatically, freeing busy homeowners from daily manual upkeep.

    We’ve already talked about drip irrigation, but automation goes further than that these days. Solar lights need zero wiring and just work once installed. Some newer irrigation controllers even connect to your phone and adjust watering based on weather forecasts — skipping a cycle automatically if rain’s expected.

    None of this is expensive anymore either. A decent solar garden light setup for a small yard runs around ₹1,500-₹3,000 in 2026, and it pays for itself in convenience alone.

    I’ll admit I was skeptical about “smart” garden gadgets at first — felt like unnecessary tech for something that should be simple. But a basic timer alone saved me probably 20 minutes a day. That adds up fast over a month.

    Keep Pest and Weed Control Simple

    Nobody wants to spend their weekend spraying chemicals or hand-pulling weeds. The trick is prevention over cure. Dense planting (leaving less bare soil for weeds to colonize), consistent mulching, and healthy soil naturally cut down on both problems before they start.

    For minor pest issues, a simple neem oil spray handles most common garden pests without harsh chemicals — and it’s cheap, available at any nursery. [link to related guide about organic pest control here]

    Rotate what you plant where, year to year, if you’re growing anything edible. It keeps soil-borne pests and diseases from building up in one spot. Small habit, big payoff over time.


    Frequently Asked Questions

    What are the easiest low maintenance plants for Indian homes? Aloe vera, money plant, bougainvillea, hibiscus, and curry leaf plants are pretty much foolproof across most Indian climates. They tolerate irregular watering and don’t need constant fertilizing.

    How often should I water a low maintenance garden? It really depends on the plants and season, but most drought-tolerant and native plants only need watering 2-3 times a week in summer, and even less in cooler months — especially once they’re established.

    Is drip irrigation expensive to install? Not really. A basic setup for a small home garden costs somewhere between ₹3,000 and ₹8,000, and most people recover that cost through water savings within a year or two.

    Can container gardens really be low maintenance? Yes, often more so than in-ground beds. You control the soil quality directly, weeds are far less of an issue, and self-watering pots reduce watering frequency significantly.

    Do I need to remove my lawn completely to save time? No — even shrinking your lawn by half and replacing the rest with mulch, gravel, or ground cover cuts weekly upkeep noticeably. It doesn’t have to be all-or-nothing.

    What’s the best mulch for a low maintenance garden in India? Coco peat is widely available, affordable, and holds moisture well. Dried leaves and grass clippings work too, and they’re free if you already have a lawn.

    Conclusion

    A low-effort garden isn’t about giving up on a beautiful yard — it’s about being smart with your choices from the start. Pick native plants, set up drip irrigation, mulch generously, and lean on perennials over high-maintenance annuals. Small changes, but they add up to hours of your weekend back.

    Start with just one or two of these low maintenance garden ideas this month — maybe swap in a drip line, or mulch one bed — and build from there. [link to related guide on choosing the right plants for your climate zone here] Your future self, relaxing on a Sunday instead of weeding, will thank you.

  • DIY Plumbing Repair vs Professional: When to Call an Expert

    DIY Plumbing Repair vs Professional: When to Call an Expert

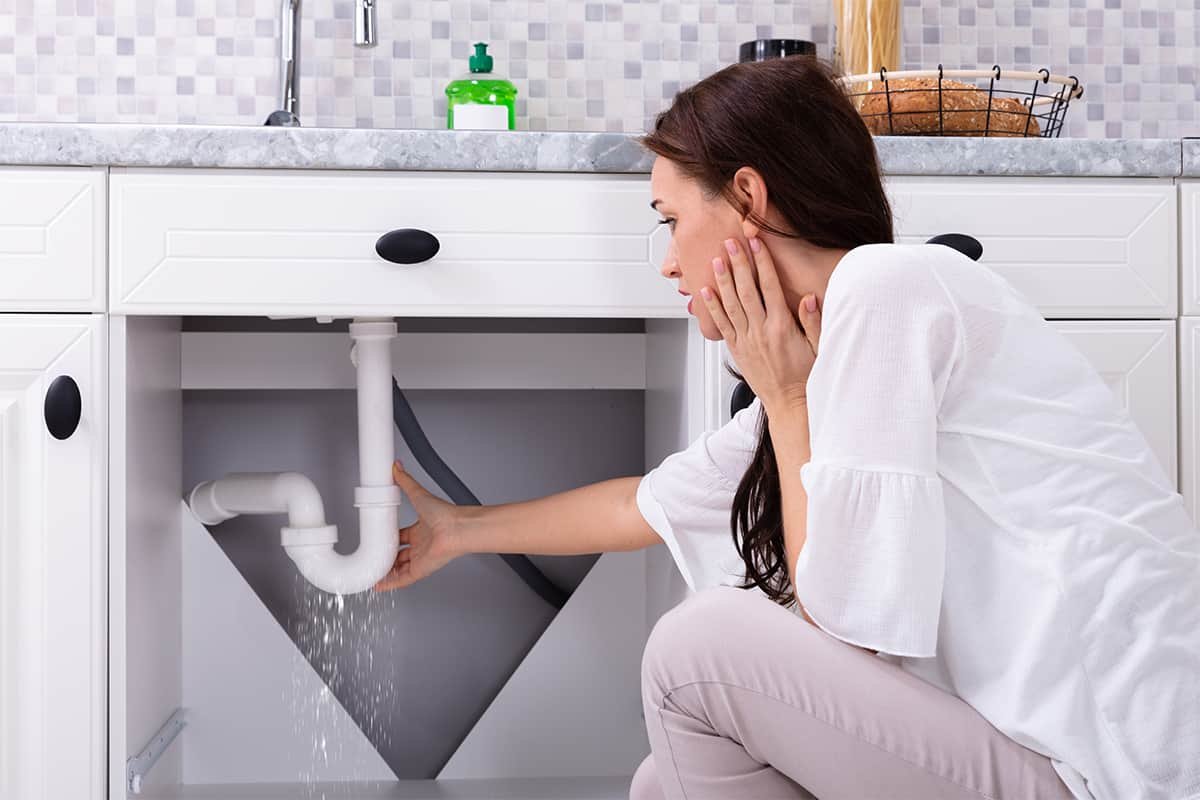
    So your tap won’t stop dripping, or worse, there’s water pooling under the sink and you’re standing there with a wrench you don’t quite know how to use. Do you grab a YouTube tutorial and go for it, or do you pick up the phone? That’s really the whole question behind DIY plumbing repair, and honestly, the answer isn’t the same for everyone.

    I’ve fixed my share of leaky faucets and made a few things worse in the process. There’s real satisfaction in solving a problem yourself — and real money to be saved. But plumbing has a sneaky way of punishing overconfidence. A small mistake with water and pipes can turn into a flooded kitchen faster than you’d think. This guide will help you figure out where the line actually sits, in 2026, with Indian homes and plumbing systems in mind.

    What Counts as a Safe DIY Plumbing Repair?

    DIY plumbing repair generally covers small, low-risk fixes that don’t involve cutting pipes, altering water lines, or touching your main supply. Think clogged drains, a running cistern, or a loose tap handle — jobs where a mistake costs you an hour, not a flooded floor.

    Some jobs are genuinely beginner-friendly, and there’s no reason to pay someone ₹500 just to unclog a sink you could fix in ten minutes. Here’s what usually falls into safe territory:

    • Unclogging a slow drain with a plunger or a simple drain snake
    • Replacing a tap washer that’s causing a drip
    • Fixing a running toilet cistern (usually just a worn flapper or float)
    • Reattaching a loose showerhead
    • Cleaning aerators clogged with mineral deposits — very common with hard water in cities like Jaipur

    None of these require special tools beyond what’s in a basic home toolkit. A wrench, some plumber’s tape, maybe a bucket. I’d say if the job takes under 30 minutes and doesn’t involve opening a wall or a pipe joint, you’re probably fine going it alone.

    Tools Every DIY-Minded Homeowner Should Own

    You don’t need a full workshop. A decent adjustable wrench, a plunger, PTFE tape, a bucket, and a torch (for under-sink work) will cover most small jobs. I keep mine in a shoebox under the kitchen sink — not glamorous, but it works.

    Signs a Plumbing Job Is Too Big for DIY

    A DIY plumbing repair stops being a good idea the moment you’re dealing with hidden pipework, gas lines, sewage backups, or anything involving your building’s main water supply. If you smell gas, see water stains spreading on a ceiling, or notice sewage backing up into a drain, stop and call a licensed plumber immediately.

    Here’s the thing — some problems look small on the surface but hint at something bigger underneath. I once ignored a slow drip under my kitchen sink for two weeks, telling myself I’d “get to it.” By the time I did, the cabinet base had swollen and warped. That ₹200 washer I was avoiding buying turned into a ₹4,000 carpentry repair.

    Warning signs that mean it’s time to call a professional:

    • Water pressure that’s suddenly dropped across the whole house, not just one tap
    • Recurring clogs in the same drain, even after you’ve cleared it — could mean a deeper blockage or root intrusion in older buildings
    • Any smell of gas near a geyser or stove connection
    • Water stains on ceilings or walls, especially if they’re spreading
    • A burst or badly corroded pipe (common in older Jaipur homes with decades-old GI piping)
    • Sewage smell or backup from floor drains

    If you’re seeing any of these, this isn’t the moment to be brave with a YouTube video open on your phone.

    The Real Risks of Attempting Complex Repairs Yourself

    Look, I’m not trying to scare you off every home repair. But there’s a difference between fixing a leaky washer and rerouting pipework behind a wall. The risks of going in over your head are bigger than most people expect.

    Water damage compounds fast. A pipe that’s leaking slowly inside a wall can rot wood, grow mold, and damage electrical wiring — and you might not even notice until the damage is done. Then there’s the cost of doing it twice: botch a repair, and you’ll likely pay a plumber more to undo your work before they can even start the actual fix.

    There’s also a safety angle people forget. Working near a geyser’s plumbing connections, for instance, means dealing with both water and electricity in the same tight space. That’s not a place for guesswork.

    And in apartment buildings or housing societies, unauthorized changes to shared plumbing lines can actually violate your maintenance agreement. I’ve heard of at least one case in a Jaipur housing society where a resident’s DIY pipe rerouting caused a leak that affected the flat below — and the repair bill (for both flats) landed squarely on them.

    Cost Comparison: DIY vs Hiring a Professional Plumber

    A basic DIY plumbing repair like a tap washer or clog might cost you ₹100–₹300 in parts. Hiring a professional for the same job typically runs ₹300–₹800 including a visit charge — but for complex work like pipe replacement, professional rates (₹1,500 upward) are usually cheaper than fixing your own mistakes twice.

    Let’s break it down with rough 2026 pricing for Indian cities:

    JobDIY CostProfessional Cost
    Tap washer replacement₹50–₹150₹300–₹500
    Clogged drain₹100–₹250 (drain cleaner/snake)₹400–₹600
    Running cistern fix₹150–₹300₹400–₹700
    Pipe leak (minor)₹300–₹600₹800–₹1,500
    Pipe replacement/burst pipeNot recommended₹1,500–₹4,000+
    Water heater/geyser plumbingNot recommended₹1,000–₹3,000

    These numbers shift depending on your city and whether it’s an emergency call (nighttime or weekend visits usually cost 20-30% more). The math generally favors DIY for small stuff and professionals for anything structural — not because plumbers are trying to overcharge you, but because they’re pricing in the risk and skill that keeps a bigger bill from showing up later.

    How to Find a Reliable Professional Plumber

    Finding someone trustworthy is honestly half the battle. A bad plumber can be almost as costly as a bad DIY attempt.

    A few things I look for:

    1. Ask neighbors or your housing society WhatsApp group for recommendations — word of mouth still beats app ratings in most Indian cities
    2. Check if they’re associated with a known service platform (Urban Company, local plumbing associations) for some accountability
    3. Get a rough quote before they start, not after
    4. Ask if they’ll guarantee their work for at least a few weeks
    5. Avoid anyone who insists on cash-only payment with no receipt — a small thing, but it says something

    Picture this: a small business owner in Jaipur runs a tiny café, and one morning the kitchen sink backs up right before opening. Panicking and calling the first “plumber near me” result isn’t ideal — but neither is spending an hour comparing five quotes while customers wait outside. The smart middle ground is having a plumber’s number saved before the emergency hits. [link to related guide about emergency home repair checklists here]

    Preventive Maintenance: Reducing the Need for Repairs Altogether

    Here’s an underrated truth — most plumbing emergencies are preventable. A little maintenance goes a long way toward avoiding the DIY-vs-pro dilemma altogether.

    Things worth doing every few months:

    • Clean tap aerators and showerheads to prevent mineral buildup, especially with hard water
    • Check under-sink pipes for early signs of moisture or corrosion
    • Avoid pouring oil or food scraps down kitchen drains (this alone prevents a huge chunk of clogs)
    • Get your geyser serviced annually — sediment buildup causes both plumbing and electrical issues
    • Test your main shut-off valve occasionally so you’re not fumbling for it during an actual emergency

    I’ll be honest, I used to skip this stuff entirely until a clogged drain turned into a full weekend project. Now I do a quick five-minute check every couple of months, and it’s genuinely cut down on the number of “emergency” calls I’ve had to make. [link to related guide about seasonal home maintenance checklist here]

    When Emergency Plumbing Situations Demand Immediate Professional Help

    Burst pipes, gas leaks near plumbing fixtures, sewage backups, and total loss of water pressure are emergencies — don’t attempt a DIY plumbing repair in these situations. Shut off your main water valve, and call a professional immediately.

    Some situations just don’t leave room for trial and error. If a pipe bursts, your first move should be finding your main shut-off valve — not grabbing a wrench. Every household should know exactly where that valve is before an emergency happens, not during one.

    Has your water ever suddenly turned brown or started smelling odd? That’s often a sign of a corroded pipe or a bigger issue in the supply line, and it’s worth getting checked by a professional even if the water clears up on its own after a bit.

    Building Your Own Judgment: A Simple Decision Checklist

    Rather than memorizing every rule, ask yourself these questions before starting any repair:

    • Does this involve cutting into a pipe or wall? → Call a pro
    • Is there a smell of gas anywhere nearby? → Call a pro, immediately
    • Have I done this exact repair before, successfully? → DIY is probably fine
    • Will a mistake here cost more than a plumber’s visit charge? → Call a pro
    • Is this affecting shared building infrastructure? → Call a pro (and check your society rules)

    If most of your answers point toward “call a pro,” trust that instinct. Confidence is good; overconfidence with water pipes is how living rooms end up needing new flooring.

    Frequently Asked Questions

    Is it cheaper to do plumbing repairs myself? For small jobs, yes — you’ll usually save money doing simple fixes like a tap washer or clog yourself. But for anything involving pipe replacement or hidden leaks, DIY mistakes often end up costing more once you factor in water damage or a plumber having to redo your work.

    What plumbing repairs should never be done without a professional? Anything involving gas lines, main water supply connections, sewage systems, or structural pipe work should always go to a licensed plumber. These carry safety risks and can cause serious property damage if done incorrectly.

    How do I know if I have a hidden pipe leak? Watch for unexplained increases in your water bill, damp patches on walls or ceilings, a musty smell, or a water meter that keeps ticking even when everything’s turned off. Any of these warrant a professional inspection.

    Can a bad DIY plumbing repair void my home insurance? It can, depending on your policy. Some insurers won’t cover water damage that resulted from unlicensed or improper repair work, so it’s worth checking your policy terms before attempting anything beyond basic fixes.

    How often should I get my plumbing professionally inspected? Once a year is a reasonable baseline for most homes, especially older buildings with aging pipework. If you’re in a newer flat with modern plumbing, every two years is usually fine unless issues come up sooner.

    What should I do immediately if a pipe bursts at home? Shut off your main water valve first, then call a plumber. Don’t waste time trying to patch it yourself — a burst pipe can flood a room within minutes, and stopping the water source matters more than the fix itself.

    Conclusion

    At the end of the day, DIY plumbing repair works best for the small stuff — clogs, drips, worn washers — the things where a mistake costs you a trip to the hardware store, not a flooded floor. The moment gas, sewage, hidden pipework, or shared building lines are involved, that’s your cue to hand it over to someone trained for it.

    Keep a plumber’s number saved on your phone before you need it, not after. And honestly? Do that five-minute maintenance check every couple of months — future-you will thank present-you the next time a drain threatens to back up right before guests arrive.

  • Hidden Water Leak Signs You Shouldn’t Ignore

    Hidden Water Leak Signs You Shouldn’t Ignore

    Your water bill jumped by a few hundred rupees this month, and you’ve got no idea why. No visible puddles, no dripping tap. Sound familiar? This is usually one of the first hidden water leak signs homeowners notice — and it’s easy to brush off as a billing error until the real damage shows up.

    I learned this the hard way in my own flat. A leak behind the bathroom wall went unnoticed for almost three months because nothing looked wrong on the surface. By the time I caught it, the tiles near the floor had started to loosen. Hidden leaks are sneaky like that — they hide behind walls, under floors, inside ceilings, and by the time you can see them, they’ve usually been at it for weeks. This guide walks through the real warning signs, what causes them, and how to actually deal with one in 2026 without tearing your whole house apart.

    What Are the Most Common Hidden Water Leak Signs?

    The most common hidden water leak signs include a rising water bill with no change in usage, a water meter that keeps moving when everything’s off, damp patches on walls or ceilings, a musty smell, and peeling paint or bubbling wallpaper near pipe lines.

    None of these scream “emergency” on their own. That’s exactly the problem. A slightly higher water bill gets blamed on “maybe I left the tap running.” A faint musty smell gets written off as monsoon dampness. But put two or three of these together, and you’re probably looking at a leak somewhere behind your walls or under your flooring.

    Here’s what to actually watch for:

    • Water bill that’s noticeably higher than your usual average, without any obvious reason
    • A water meter reading that changes even when every tap in the house is shut off
    • Cracks appearing in walls or flooring near bathrooms and kitchens
    • Paint that’s bubbling, flaking, or discolored — especially in patches, not evenly
    • A musty or earthy smell in a room with no obvious source
    • Sound of running water when nothing’s turned on (this one genuinely creeps people out, but it’s a real sign)

    How to Check Your Water Meter for a Hidden Leak

    This is probably the single most reliable DIY test, and almost nobody does it.

    Turn off every tap, appliance, and anything else that uses water in your home. Then go check your water meter and note the exact reading. Wait about two hours without using any water — don’t even flush the toilet during this window. Check the meter again.

    If the number has moved at all, you’ve got a leak somewhere in your system. It’s really that simple.

    A quicker (though less precise) version: check your meter right before bed, then again first thing in the morning, assuming nobody’s used water overnight. Even a small movement on the dial is worth investigating further.

    Understanding Your Water Bill Patterns

    Keep your last 3-4 months of water bills handy. A household of four in a typical apartment usually uses somewhere around 15,000-20,000 litres a month, though this varies a lot by lifestyle and city. If your usage jumps 30% or more without a lifestyle change — say, no new guests, no extra laundry — that’s a red flag worth chasing down.

    Where Hidden Leaks Usually Happen in Indian Homes

    Older buildings in particular tend to have a few usual suspects. I’ve noticed that GI (galvanized iron) piping, common in flats built before the early 2000s, corrodes from the inside out — which means the pipe can look perfectly fine on the outside while leaking internally for years.

    The most common trouble spots:

    1. Under-slab plumbing, especially in ground-floor flats where pipes run beneath the concrete
    2. Bathroom wall cavities, where supply lines to showers and geysers run hidden
    3. Behind kitchen sinks, particularly where flexible connector pipes meet the main line
    4. Overhead water tanks and their connecting pipework, especially with cheap plastic fittings
    5. Underground supply lines running from the main connection to the building

    Picture a small business owner in Jaipur running a home-based tailoring unit from the ground floor of an old haveli-style building. The floor near one wall kept feeling slightly damp, but with fabric rolls everywhere, it was easy to miss for weeks. Turned out an underground pipe joint had been leaking slowly the whole time, and the dampness was slowly rotting a section of wooden flooring. A ₹500 pipe joint fix could’ve prevented what became a ₹15,000 flooring repair.

    Health and Structural Risks of Ignoring a Leak

    Ignoring hidden water leak signs for too long risks mold growth, weakened structural beams, electrical hazards from water reaching wiring, and pest infestations — plus a steadily rising water bill the entire time the leak goes unaddressed.

    Mold is probably the risk people underestimate the most. It doesn’t need much — just consistent moisture and a few weeks. Once it’s established behind a wall or under flooring, getting rid of it properly (not just painting over it) usually means opening up that section entirely.

    There’s also a structural angle that’s easy to forget about. Prolonged water exposure weakens wood, rusts metal reinforcement in concrete, and can eventually affect a wall’s load-bearing capacity in serious cases. That’s not something that happens overnight, thankfully, but it’s not something to gamble with either.

    And if water reaches electrical wiring or a switchboard — that’s a genuine safety hazard, not just a repair inconvenience.

    DIY Detection Methods You Can Try at Home

    Before calling anyone, there’s a fair bit you can check yourself, and it costs nothing but a bit of time.

    • Food coloring toilet test: Add a few drops of food coloring to your toilet tank. Wait 15 minutes without flushing. If color shows up in the bowl, your flapper valve is leaking — a surprisingly common and cheap fix.
    • Listen closely: Walk through quiet rooms, especially near bathrooms, and just listen. A hissing or trickling sound with no visible source is a strong clue.
    • Check outdoor areas too: Unusually green or soggy patches of grass or soil near your building’s foundation, even in dry weather, often point to an underground leak.
    • Infrared thermometer trick: A cheap infrared thermometer (available for under ₹1,000 online) can spot temperature differences in walls — a cooler patch near plumbing often means moisture is present, since evaporating water pulls heat from the surface.

    None of these replace a professional inspection for confirmed leaks, but they’re a solid first pass before you spend money on one. [link to related guide about DIY plumbing repair here]

    When to Call a Professional for Leak Detection

    Some leaks just aren’t findable with a food coloring test and a bit of patience.

    Call a professional leak detection service when the water meter confirms a leak but you can’t locate the source, when the leak is behind tiled walls or under concrete flooring, or when water damage keeps recurring despite repairs. Professionals use acoustic and thermal imaging tools that pinpoint leaks without demolition guesswork.

    Modern leak detection technicians use acoustic listening devices that can pick up the sound of water escaping a pipe, even through concrete or tile. Some also use thermal cameras, which is honestly a bit fascinating to watch — they can basically “see” where the moisture is sitting behind a wall without breaking anything open first.

    Costs for professional leak detection in Indian cities typically range from ₹1,500 to ₹4,000 depending on the property size and how tricky the leak is to trace. That might sound like a lot for someone “just looking,” but compare it to blindly breaking open three different walls hoping you guess right — it’s usually the cheaper option in the end.

    Fixing a Hidden Leak: What the Repair Process Actually Looks Like

    Once the leak’s located, the fix itself depends heavily on where it is and what caused it.

    For a leak in an accessible spot — say, behind a kitchen sink cabinet — a plumber can usually replace the damaged section of pipe or fitting within an hour or two. Simple, relatively cheap, done same day.

    For leaks under flooring or inside walls, it gets more involved. This typically means:

    • Breaking a small, targeted section of tile or wall to access the pipe (professionals aim to minimize this, not demolish the whole wall)
    • Replacing or repairing the damaged pipe section
    • Checking for mold or water damage in the surrounding area before sealing back up
    • Re-tiling or replastering the opened section

    Expect this kind of repair to run anywhere from ₹3,000 to ₹10,000+ depending on the extent of damage and finishing work needed. It’s not cheap, I’ll be honest. But it’s a lot less painful than what happens if that same leak runs unchecked for another six months.

    Preventing Future Hidden Leaks

    A bit of prevention genuinely goes a long way here, more than people give it credit for.

    Get your plumbing inspected once a year, especially if your building is older than 15 years. Keep an eye on your water bill every month rather than just glancing at the total — a quick habit that takes thirty seconds. Replace old flexible connector pipes (the ones under sinks and behind washing machines) every 5-7 years, since these are a common failure point. And if you’re renovating anyway, it’s worth asking your contractor to check pipe conditions before closing up any walls. [link to related guide about seasonal home maintenance checklist here]

    Frequently Asked Questions

    How can I tell if I have a hidden water leak without cutting into walls? Start with your water meter test — turn everything off and check if it moves over a couple of hours. Combine that with watching your water bill trends and checking for musty smells or damp patches, and you’ll usually have a strong enough clue to justify calling in a professional.

    Can a hidden leak cause mold even if I can’t see any water? Yes, definitely. Mold only needs consistent moisture, not standing water you can see. A slow leak behind a wall can feed mold growth for weeks before anything becomes visible on the surface.

    How much does it cost to fix a hidden water leak in India? It varies quite a bit — a simple accessible pipe fix might run ₹500-1,500, while leaks under flooring or behind tiled walls, including repair and finishing work, typically cost ₹3,000-10,000 or more.

    Will my water bill go back to normal after fixing a leak? In most cases, yes, your bill should return close to your normal usage pattern within one billing cycle after the leak’s properly fixed. If it doesn’t, there might be a second leak you haven’t found yet.

    Does home insurance cover hidden water leak damage in India? Some comprehensive home insurance policies do cover water damage from leaks, though coverage varies a lot between insurers and policies. It’s worth checking your specific terms, since some exclude gradual damage versus sudden pipe bursts.

    How often should I check for hidden leaks even if nothing seems wrong? A water meter check every few months is a reasonable habit, plus a full plumbing inspection once a year for older buildings. Catching a leak early is genuinely the difference between a small repair bill and a big one.

    Conclusion

    Most hidden water leak signs are quiet ones — a slightly higher bill, a faint smell, a patch of paint that just doesn’t look right. None of them shout for attention, which is exactly why they get ignored for so long. But catching them early is the difference between a same-day pipe fix and a repair bill with a lot more zeros in it.

    Do the water meter test this weekend. It takes ten minutes and costs nothing. If something feels off, don’t wait around hoping it fixes itself — get a professional to trace it before it turns into a bigger, wetter problem.

  • Natural Cleaning Products That Actually Work (DIY Recipes Included)

    Natural Cleaning Products That Actually Work (DIY Recipes Included)

    Let’s be honest — a lot of “natural cleaning” advice online is useless. Vague tips like “use vinegar” without any actual ratios, or recipes that smell nice but don’t actually cut through grease. I’ve tested a fair number of these over the years, and this guide only includes natural cleaning products and DIY mixes that genuinely hold up against real household grime, not just Pinterest-worthy photos. If you’ve been putting off switching from harsh chemical cleaners because you assumed natural options wouldn’t work as well, I get it — I was skeptical too. Turns out some of them work better than the stuff sitting under your sink right now.

    Do Natural Cleaning Products Actually Work as Well as Chemical Ones?

    Natural cleaning products hold up well for most everyday cleaning — degreasing, disinfecting surfaces, removing hard water stains, and general grime. Where they genuinely fall short is heavy-duty disinfection (like after illness) and stubborn mold, where you may still need something stronger occasionally.

    I’ll be upfront about this, because a lot of blogs oversell natural cleaning as a universal replacement, and that’s just not honest. For daily kitchen counters, bathroom sinks, and general surfaces, natural options work just fine. For genuinely killing certain bacteria and viruses to hospital-grade standards, you need EPA-registered disinfectants — vinegar isn’t going to cut it there.

    That said, for probably 90% of what an average household actually cleans day to day, natural products do the job. And they cost noticeably less over time, plus they’re a lot gentler on skin if you’re the one doing the scrubbing.

    The Core Ingredients Behind Effective Natural Cleaning Products

    Most homemade natural cleaning products are built from a small handful of ingredients, used in different combinations depending on the job.

    • White vinegar — cuts through grease, dissolves mineral deposits, and works as a mild disinfectant. The smell fades within an hour or so once dry
    • Baking soda — mild abrasive, great for scrubbing without scratching, also neutralizes odors
    • Castile soap — a plant-based soap concentrate; a little goes a long way, and it works for nearly everything from dishes to floors
    • Lemon juice — natural degreaser and stain-lifter, particularly good on brass and copper
    • Salt — adds mild abrasive scrubbing power when combined with other ingredients
    • Essential oils (tea tree, eucalyptus, lemon) — some have mild antibacterial properties, but honestly their bigger role is just making things smell decent

    One thing worth knowing upfront: never mix vinegar with bleach, or baking soda with bleach. It sounds obvious, but people do it accidentally, and the fumes can be genuinely dangerous. Stick to natural-only combinations, and don’t cross-contaminate with chemical cleaners in the same session.

    DIY All-Purpose Cleaner Recipe

    Direct answer: A basic all-purpose natural cleaner needs just 1 cup white vinegar, 1 cup water, and 10-15 drops of essential oil in a spray bottle — effective on most kitchen and bathroom surfaces, though it should be avoided on natural stone.

    Ingredients

    • 1 cup white vinegar
    • 1 cup water
    • 10-15 drops essential oil (lemon or tea tree work well)
    • Spray bottle (reused ones work fine)

    Instructions

    1. Combine vinegar and water in the spray bottle
    2. Add essential oil drops
    3. Shake before each use — the oil separates over time
    4. Spray on counters, stovetops, or bathroom surfaces and wipe

    I keep one of these under my kitchen sink permanently now. It handles daily spills and counter wipe-downs without me thinking twice, and a batch costs maybe Rs. 15-20 to make versus Rs. 150+ for a branded spray.

    One caution: don’t use vinegar-based cleaners on granite, marble, or other natural stone countertops. The acidity etches the surface over time — I learned this the hard way on a friend’s kitchen counter, and it wasn’t pretty.

    DIY Bathroom and Grout Cleaner

    Bathroom grime is where most people give up on natural cleaning too early, assuming it just won’t work on tough buildup. It does — it just needs a slightly different approach than spray-and-wipe.

    Baking Soda Grout Paste

    • 3 parts baking soda
    • 1 part water
    • Mix into a thick paste, apply directly to grout lines with an old toothbrush
    • Let sit 10-15 minutes, then scrub and rinse

    Showerhead Descaler

    • Fill a plastic bag with white vinegar
    • Secure it around the showerhead with a rubber band, fully submerging the nozzle
    • Leave for 1 hour (longer for heavy buildup, common with hard water)
    • Remove, run hot water through for a minute

    Has your showerhead ever gone from a strong stream to a sad trickle over a few months? That’s mineral buildup, and this trick fixes it without buying a new fixture.

    [link to related deep cleaning checklist guide here]

    DIY Glass and Mirror Cleaner

    Store-bought glass cleaners are honestly one of the easiest things to replace, and the homemade version streaks less in my experience, not more.

    • 2 cups water
    • 1/4 cup white vinegar
    • 1/4 cup rubbing alcohol (optional, but helps with faster drying and less streaking)
    • A few drops of dish soap, if surfaces are particularly greasy

    Mix in a spray bottle, spray lightly, and wipe with newspaper or a microfiber cloth rather than paper towels — paper towels tend to leave lint behind, which oddly enough makes glass look dirtier, not cleaner.

    DIY Floor Cleaner for Different Surfaces

    Different flooring needs different treatment, and using the wrong natural mix can actually cause damage.

    For Tile and Vinyl

    • 1/2 cup vinegar
    • 1 gallon warm water
    • A few drops of castile soap
    • Mop as usual; no rinsing required

    For Wooden Floors

    • 1/4 cup vinegar (diluted more than tile, since wood is more sensitive)
    • 1 gallon warm water
    • Damp mop only — never soak wooden floors, which can cause warping over time

    For Natural Stone (marble, granite)

    Skip vinegar entirely here. Use warm water with a small amount of pH-neutral castile soap instead — acidic cleaners will dull and etch stone surfaces over repeated use.

    Natural Odor Removers and Air Fresheners

    Chemical air fresheners mostly mask smells rather than actually dealing with them, which always bothered me a bit.

    • Baking soda bowls placed in the fridge, shoe cabinets, or bathroom absorb odors genuinely well, not just cover them up
    • Simmer pot: a pot of water with lemon slices, cinnamon sticks, and cloves, simmered on low — fills the house with a natural scent for hours
    • Activated charcoal bags in closets or cars, particularly effective against musty smells
    • Essential oil diffuser with a few drops of your preferred scent, refreshed every few days

    Picture a small business owner in Jaipur running a home bakery — she switched from a chemical air freshener to a cinnamon-clove simmer pot during customer visits, and multiple people commented it made the whole house feel warmer, not just “cleaner.” Small change, noticeable difference.

    Frequently Asked Questions

    Are natural cleaning products safe around pets and children? Generally yes, more so than most chemical cleaners, though pure essential oils should still be kept out of reach and diluted properly — some, like tea tree oil, can be irritating in concentrated form, especially around cats.

    How long do DIY natural cleaning products last before they go bad? Vinegar-based sprays typically stay effective for 1-2 months if stored in a cool, dark spot. Anything with essential oils may lose potency a bit faster, so smaller batches made more often work better than one giant bottle.

    Can I use natural cleaning products on all surfaces? Not quite all — avoid vinegar-based cleaners on natural stone, cast iron, and some hardwood finishes, since the acidity can cause damage over repeated use. Always test a small hidden spot first if you’re unsure.

    Do natural cleaning products actually disinfect, or just clean? Vinegar and certain essential oils have some antibacterial properties, but they’re not registered disinfectants in the way bleach or alcohol-based products are. For everyday cleaning they’re fine; after illness in the house, you may want something stronger.

    Is it cheaper to make natural cleaning products at home? Substantially, yes. A homemade all-purpose spray costs a fraction of a branded bottle, and ingredients like vinegar and baking soda go a long way — one bottle of vinegar can make several batches of cleaner.

    What’s the biggest mistake people make with DIY natural cleaners? Mixing incompatible ingredients, particularly anything with bleach, which can create dangerous fumes. Stick to vinegar, baking soda, castile soap, and essential oils in their own separate combinations, and never introduce bleach into the mix.

    Conclusion

    Natural cleaning products aren’t some watered-down compromise — for most everyday cleaning, they genuinely hold their own against chemical alternatives, and they cost less while being a lot gentler to use regularly. Start with the all-purpose spray, since it covers the most ground, then build out from there as specific needs come up around your home.

    Try making just one of these recipes this week — the all-purpose spray takes two minutes — and see how it handles your actual daily mess before committing to switching everything over at once.

  • Deep Cleaning Checklist: Room-by-Room Guide for a Spotless Home

    Deep Cleaning Checklist: Room-by-Room Guide for a Spotless Home

    Somewhere around the third weekend you’ve told yourself “this is the weekend I finally deep clean,” you’ve probably realized the problem isn’t motivation — it’s that you don’t actually know where to start. A proper deep cleaning checklist solves exactly that. Not the quick Saturday tidy-up, but the real thing: baseboards, behind the fridge, the grout you’ve been avoiding since Diwali. I’ve broken this down room by room, because trying to deep clean an entire house in one go is how most people burn out by lunchtime and give up halfway through the kitchen. Grab a couple of hours, pick one room, and let’s actually get through this properly.

    What Counts as “Deep Cleaning” vs Regular Cleaning?

    Deep cleaning checklist tasks go beyond your weekly wipe-down — they target buildup that accumulates over months, not days. Regular cleaning keeps things tidy on the surface; deep cleaning addresses what’s hiding underneath, behind, and inside.

    Regular cleaning is sweeping, wiping counters, doing dishes. Deep cleaning is moving the sofa and finding out what’s actually under there. It’s cleaning inside the oven, not just around it. It’s scrubbing grout lines instead of just mopping over them.

    I’d argue most Indian households do a version of this naturally before Diwali — the whole “safai” tradition is basically deep cleaning by another name. But doing it just once a year isn’t really enough for a genuinely healthy home. Quarterly is more realistic, and honestly, even that’s a stretch for most busy households — so don’t feel bad if you’re doing this twice a year instead.

    Kitchen Deep Cleaning Checklist

    The kitchen accumulates grease and grime faster than any other room, mostly because of daily cooking — especially with Indian cooking involving a fair bit of oil and spice residue that regular wiping just doesn’t fully catch.

    • Clean inside the refrigerator, including under drawers and the door seal (mold loves that seal gasket)
    • Degrease the chimney/exhaust fan filter — soak in hot water with dish soap for 20-30 minutes
    • Wipe down cabinet exteriors and interiors, checking for pest activity in corners
    • Deep clean the oven or microwave interior
    • Scrub the sink, including around the tap base where grime builds up unnoticed
    • Clean behind and under appliances — yes, actually pull the fridge out
    • Wash all light fixtures and exhaust vents, which collect grease-laden dust over time

    Has your chimney filter ever looked almost black after just a few months? That’s completely normal in an Indian kitchen, and it’s exactly why this needs to be on a recurring schedule, not a one-time thing.

    Bathroom Deep Cleaning Checklist

    Direct answer: A thorough bathroom deep clean covers grout lines, exhaust fans, behind the toilet, showerheads, and often-missed spots like the top of the mirror frame and inside cabinet corners — areas regular wiping usually skips entirely.

    Bathrooms hide grime in places you don’t look at daily.

    1. Scrub grout lines with a stiff brush and a baking soda paste — this alone makes tiles look years newer
    2. Descale the showerhead by soaking in vinegar for an hour (hard water buildup is a real problem in a lot of Indian cities)
    3. Clean behind and around the toilet base thoroughly
    4. Wipe down the exhaust fan blades, which trap dust and moisture
    5. Disinfect door handles, light switches, and taps
    6. Clean the inside of cabinets and drawers, removing expired products while you’re at it

    I’ve noticed bathroom mirrors get a filmy buildup near the edges that regular glass cleaner doesn’t touch. A bit of vinegar-water on a microfiber cloth handles it far better than the standard spray.

    Bedroom Deep Cleaning Checklist

    Bedrooms look clean on the surface most of the time — the mess is usually underneath and inside things.

    • Flip and rotate the mattress, vacuuming both sides for dust mites
    • Wash pillows (not just pillowcases) — most people never do this, and it shows in allergy symptoms more than they realize
    • Clean under the bed properly, not just a quick sweep
    • Wipe down closet interiors and check for moisture or must smell
    • Dust ceiling fans and light fixtures, top and bottom
    • Wash curtains or blinds — a task people put off for way too long

    [link to related guide on organizing a small bedroom here]

    Living Room Deep Cleaning Checklist

    This is where guests actually see, so it’s tempting to just do a surface tidy. Resist that.

    • Vacuum upholstery thoroughly, including under couch cushions (you’d be surprised what turns up)
    • Clean behind and under all furniture, including the TV unit
    • Dust and wipe down all electronics, including remote controls, which are honestly one of the germiest items in most homes
    • Wash or vacuum curtains, and dust blind slats individually
    • Clean windows inside and out, including tracks and sills
    • Deep clean any rugs or carpets — either professionally or with a rented steam cleaner

    Picture a small business owner in Jaipur who runs her home office out of the living room. She told me once that her allergies noticeably improved after she started deep cleaning the space quarterly instead of just tidying weekly — mostly from tackling the dust trapped in curtains and under the sofa that regular cleaning never touched.

    Deep Cleaning Checklist for Often-Forgotten Areas

    Direct answer: The most commonly skipped deep cleaning spots are light switches, door handles, ceiling fans, baseboards, and the tops of cabinets — areas that don’t get touched during routine cleaning but collect dust and grime steadily over months.

    These are the spots that separate an actually clean home from one that just looks clean:

    • Baseboards and skirting boards — wipe with a damp cloth; dust here is often invisible until you actually look closely
    • Tops of cabinets, wardrobes, and door frames
    • Light switches and door handles — these carry more germs than most surfaces people actively clean
    • Inside cabinet corners and drawer bottoms
    • AC vents and filters (also ties into your regular [link to related HVAC maintenance schedule guide here])
    • Underneath area rugs, which trap a shocking amount of dust

    None of these take long individually. But skip all of them for a year, and it adds up to a surprising amount of grime nobody notices until they finally look.

    Deep Cleaning Products and Tools Worth Having

    You don’t need a cabinet full of specialty products. A handful of basics covers most of this checklist.

    • Microfiber cloths (a set of 10-12 costs under Rs. 300 and outperforms regular rags by a wide margin)
    • Baking soda and vinegar — genuinely useful for grout, showerheads, and general degreasing without harsh chemicals
    • A good all-purpose degreaser for kitchen surfaces
    • A stiff grout brush — cheap, and makes a real difference on tile lines
    • A handheld vacuum with a crevice attachment for furniture gaps and corners

    I’ll admit I used to buy separate cleaners for every surface, convinced each one needed something specific. Turns out a decent all-purpose cleaner plus vinegar handles 80% of what a full deep cleaning checklist requires. Save the specialty products for the genuinely stubborn stuff.

    How Often Should You Follow a Deep Cleaning Checklist?

    Quarterly is the sweet spot for most homes — roughly once every three months. High-traffic households with kids or pets might benefit from doing it every two months instead, particularly in the kitchen and living areas.

    • Every 3 months: Full room-by-room deep clean as outlined above
    • Every 6 months: Curtains, mattress rotation, and deep carpet cleaning if you’re not doing them quarterly
    • Once a year, minimum: Anything you’ve been putting off entirely — that one cabinet, the top of the wardrobe, whatever it is

    If quarterly feels unrealistic given your schedule, breaking the checklist into one room per weekend spreads the same work out without it ever feeling overwhelming.

    Frequently Asked Questions

    How long does a full house deep clean actually take? For an average 2-3 BHK home, expect anywhere from 6-10 hours if you’re doing it all in one go, spread across a weekend. Breaking it into one room per day is far more manageable for most people.

    What’s the difference between spring cleaning and a deep cleaning checklist? They’re largely the same idea — spring cleaning is just deep cleaning done once a year, typically tied to a season. A proper deep cleaning checklist can be followed more frequently, like quarterly, rather than just annually.

    Should I hire professionals for deep cleaning or do it myself? DIY works fine for most homes if you follow a structured checklist and set aside proper time. Professional deep cleaning services (usually Rs. 3,000-8,000 depending on home size) make more sense if you’re short on time or dealing with heavy buildup after a long gap.

    What areas do people forget most often when deep cleaning? Baseboards, the tops of cabinets, behind large furniture, and exhaust fans top the list. These don’t get touched during routine cleaning, so they build up steadily without anyone noticing.

    Is deep cleaning necessary if I clean regularly anyway? Yes — regular cleaning handles visible surfaces, but it rarely reaches behind appliances, inside vents, or under furniture. Even a tidy-looking home usually has significant buildup in these hidden spots.

    Can I deep clean a whole house in one weekend? It’s possible but exhausting, and quality tends to drop by the third or fourth room. Splitting it across two weekends, or doing one room a week, usually produces better results without the burnout.

    Conclusion

    A proper deep cleaning checklist isn’t about doing everything at once — it’s about actually covering the spots regular cleaning misses, room by room, on some kind of realistic schedule. Kitchen grease, bathroom grout, bedroom dust, forgotten baseboards — none of it’s glamorous, but tackling it systematically makes a genuinely noticeable difference in how a home feels, not just how it looks.

    Pick one room this weekend — just one — and work through its checklist properly. You’ll likely find the momentum to keep going once you see the difference a proper deep clean actually makes.

  • How to Secure Your Home While on Vacation: Complete Checklist

    How to Secure Your Home While on Vacation: Complete Checklist

    You’ve booked the tickets, packed the bags, and you’re already thinking about the beach or the hills — and then it hits you. Did I lock the back gate? Is the mail going to pile up and basically announce “nobody’s home” to the whole street? Home security while traveling is one of those things people plan for two days before departure, when really it deserves a proper checklist a week out. I’ve put one together here based on what actually goes wrong, not just the generic “lock your doors” advice you’ve read a hundred times. Some of it’s obvious. Some of it, honestly, most people forget until it’s too late.

    Why Vacation Homes Are Bigger Targets Than You’d Think

    Home security while traveling matters more than people assume, because burglars are surprisingly good at spotting an empty house — often before you’ve even left the driveway.

    A pile of newspapers. Curtains that never move. No lights on for three nights straight. These are small signals, but they add up fast, and experienced burglars know exactly what to look for. Studies on residential burglary patterns consistently show that most break-ins happen during daylight hours, when houses are more likely to be empty and neighbors are at work.

    I’ve noticed a pattern with friends who’ve been burgled while traveling — it almost never happens on day one. It’s usually day three or four, once it’s clear the house has been unattended for a while. That gap is exactly why a same-day “lock up and leave” approach isn’t enough.

    Pre-Departure Home Security Checklist

    Before you even close the front door for the last time, run through this. It takes maybe 20 minutes.

    1. Stop mail and newspaper delivery, or arrange for a neighbor to collect it daily
    2. Set timers on 2-3 lights in different rooms, staggered to mimic normal usage patterns
    3. Unplug non-essential electronics — reduces fire risk and saves a bit on standby power too
    4. Double-check all door and window locks, including ones you rarely use like a balcony door or utility room
    5. Lower blinds partially — fully closed for a week straight looks just as suspicious as fully open
    6. Tell one trusted neighbor you’re away and roughly when you’ll be back

    Skip even two or three of these and you’ve basically left a note on the door saying “come on in.”

    Setting Up Smart Security Devices Before You Leave

    Direct answer: Smart cameras, video doorbells, and motion-sensor lights are the most effective tools for home security while traveling, since they let you monitor and respond remotely — even a basic setup dramatically reduces break-in risk during extended absences.

    If you don’t already have a camera system, it’s worth installing one before any trip longer than a couple of days. You don’t need anything elaborate.

    • A camera covering your main entrance, connected to your phone via app
    • Motion-activated outdoor lighting, which works even without WiFi
    • A video doorbell, so you can respond to package deliveries or knockers from anywhere
    • Door/window sensors that ping your phone if something opens unexpectedly

    [link to related guide on affordable home security systems here]

    Here’s my honest take: a lot of people install cameras and then never actually check the app while traveling. That defeats half the purpose. Set a habit — check in once a day, even just for 30 seconds, especially in the first three or four days when risk is highest.

    What to Do About Social Media While You’re Away

    This one’s a bit uncomfortable to say out loud, but it needs saying: stop posting real-time vacation photos.

    Has this ever happened to you — you post a beach photo, tag the location, and only later realize you basically just told hundreds of people your house is empty right now? A public Instagram story with a geotag is one of the easiest ways to accidentally advertise an empty home.

    • Post photos after you’re back, not during the trip
    • Keep location tags off, or at least delay them
    • Check your privacy settings — “public” profiles are visible to a lot more people than you’d guess
    • If you must post live, limit it to close friends only, not a public account

    I get pushback on this one sometimes — people say it’s paranoid. Maybe. But it costs nothing to wait a few days before posting, and the downside if you’re wrong is genuinely serious.

    Asking a Neighbor or Friend to Help Watch Your Home

    A trusted neighbor is honestly one of the most underrated tools for home security while traveling — better than half the gadgets on the market, in my opinion.

    Give them a spare key, not just for emergencies, but so they can:

    • Move your car occasionally, if it’s parked outside, to suggest someone’s around
    • Collect any packages left at the door before they pile up visibly
    • Do a quick walk-through every couple of days, just checking windows and doors
    • Water plants, which — small detail — also prevents obviously dead, wilting plants from signaling an empty house

    Picture a small business owner in Jaipur heading out for a ten-day trip to visit family. She arranged for her neighbor to park in her driveway twice during the trip and collect two Amazon deliveries left at the gate. Small effort, but it meant her house never looked unattended, even from the street.

    Securing Doors, Windows, and Entry Points Properly

    Basic locks aren’t always enough, particularly for longer trips.

    Reinforce Weak Points

    • Install a deadbolt if your main door only has a standard lock
    • Check window locks specifically — many older homes have weak or broken latches nobody’s gotten around to fixing
    • Consider a door bar or floor-mounted lock for sliding doors, which are often the weakest entry point in a home

    Don’t Forget the Less Obvious Entry Points

    • Garage doors — manually lock them, don’t rely only on the automatic opener
    • Side gates and back entrances, which get far less attention than front doors
    • Basement or ground-floor windows, especially ones hidden by shrubs or fencing

    A determined burglar isn’t stopped by a locked front door if the side window latch has been loose for two years. Worth checking before every extended trip, not just once a year.

    Using Timers, Lights, and Sound to Fake Occupancy

    Direct answer: Faking occupancy — through timed lights, occasional sound, and staggered routines — remains one of the cheapest and most effective deterrents for home security while traveling, since most burglars avoid homes that appear actively lived in.

    Smart plugs have made this a lot easier than it used to be. You can set a TV or radio to switch on for an hour in the evening, along with a lamp, without spending much at all.

    • Smart plugs for lights and a radio or TV — usually under Rs. 1,000 each
    • Vary the timing slightly day to day; a light that turns on at exactly 7:00 PM every single night starts to look automated after a week
    • Outdoor motion lights near entry points, triggered by movement rather than left on constantly
    • If you have a dog, sometimes boarding facilities post updates that unintentionally reveal you’re away — worth checking their social posting habits too

    None of this needs to be expensive. It just needs to be consistent enough that a casual glance from the street doesn’t scream “empty house.”

    Frequently Asked Questions

    How long before a trip should I start home security prep? Start about a week out for anything longer than 5-7 days. Mail holds, neighbor arrangements, and light timers all need a bit of lead time to set up properly, rather than rushing it the night before you leave.

    Is it safe to post vacation photos on social media? It’s safer to wait until you’re back home, or at least delay posting by a few days. Real-time, geotagged posts are one of the more common ways people unintentionally signal an empty house to a wider audience than they realize.

    Do smart cameras actually deter burglars, or just record after the fact? Both, honestly. Visible cameras act as a deterrent on their own, and the ones with real-time alerts let you (or the police) respond while something’s actually happening, not just review footage afterward.

    Should I stop mail delivery or just have someone collect it? Either works, but having a neighbor collect it daily is actually better, since a pile of held mail waiting at the post office doesn’t help if packages still get left at your door in the meantime.

    Is it worth hiring a house sitter for a short trip? For trips over a week, it can genuinely be worth it, especially if you don’t have a nearby neighbor you trust. For shorter trips, a good neighbor arrangement usually covers the same ground for free.

    What’s the single biggest mistake people make before traveling? Assuming a locked door is enough. It’s the combination of small signals — mail piling up, no lights, silent house, public social posts — that actually gives an empty home away, not any one factor alone.

    Conclusion

    Solid home security while traveling isn’t about one big gadget purchase — it’s a handful of small habits stacked together: stopped mail, a neighbor keeping an eye out, timed lights, secured entry points, and a bit of restraint on social media. None of it takes much money or time, but skipping even a couple of these is exactly how homes end up targeted.

    Before your next trip, actually write this checklist down and run through it the week before you leave — not the night before, when half of it gets forgotten in the rush to pack.